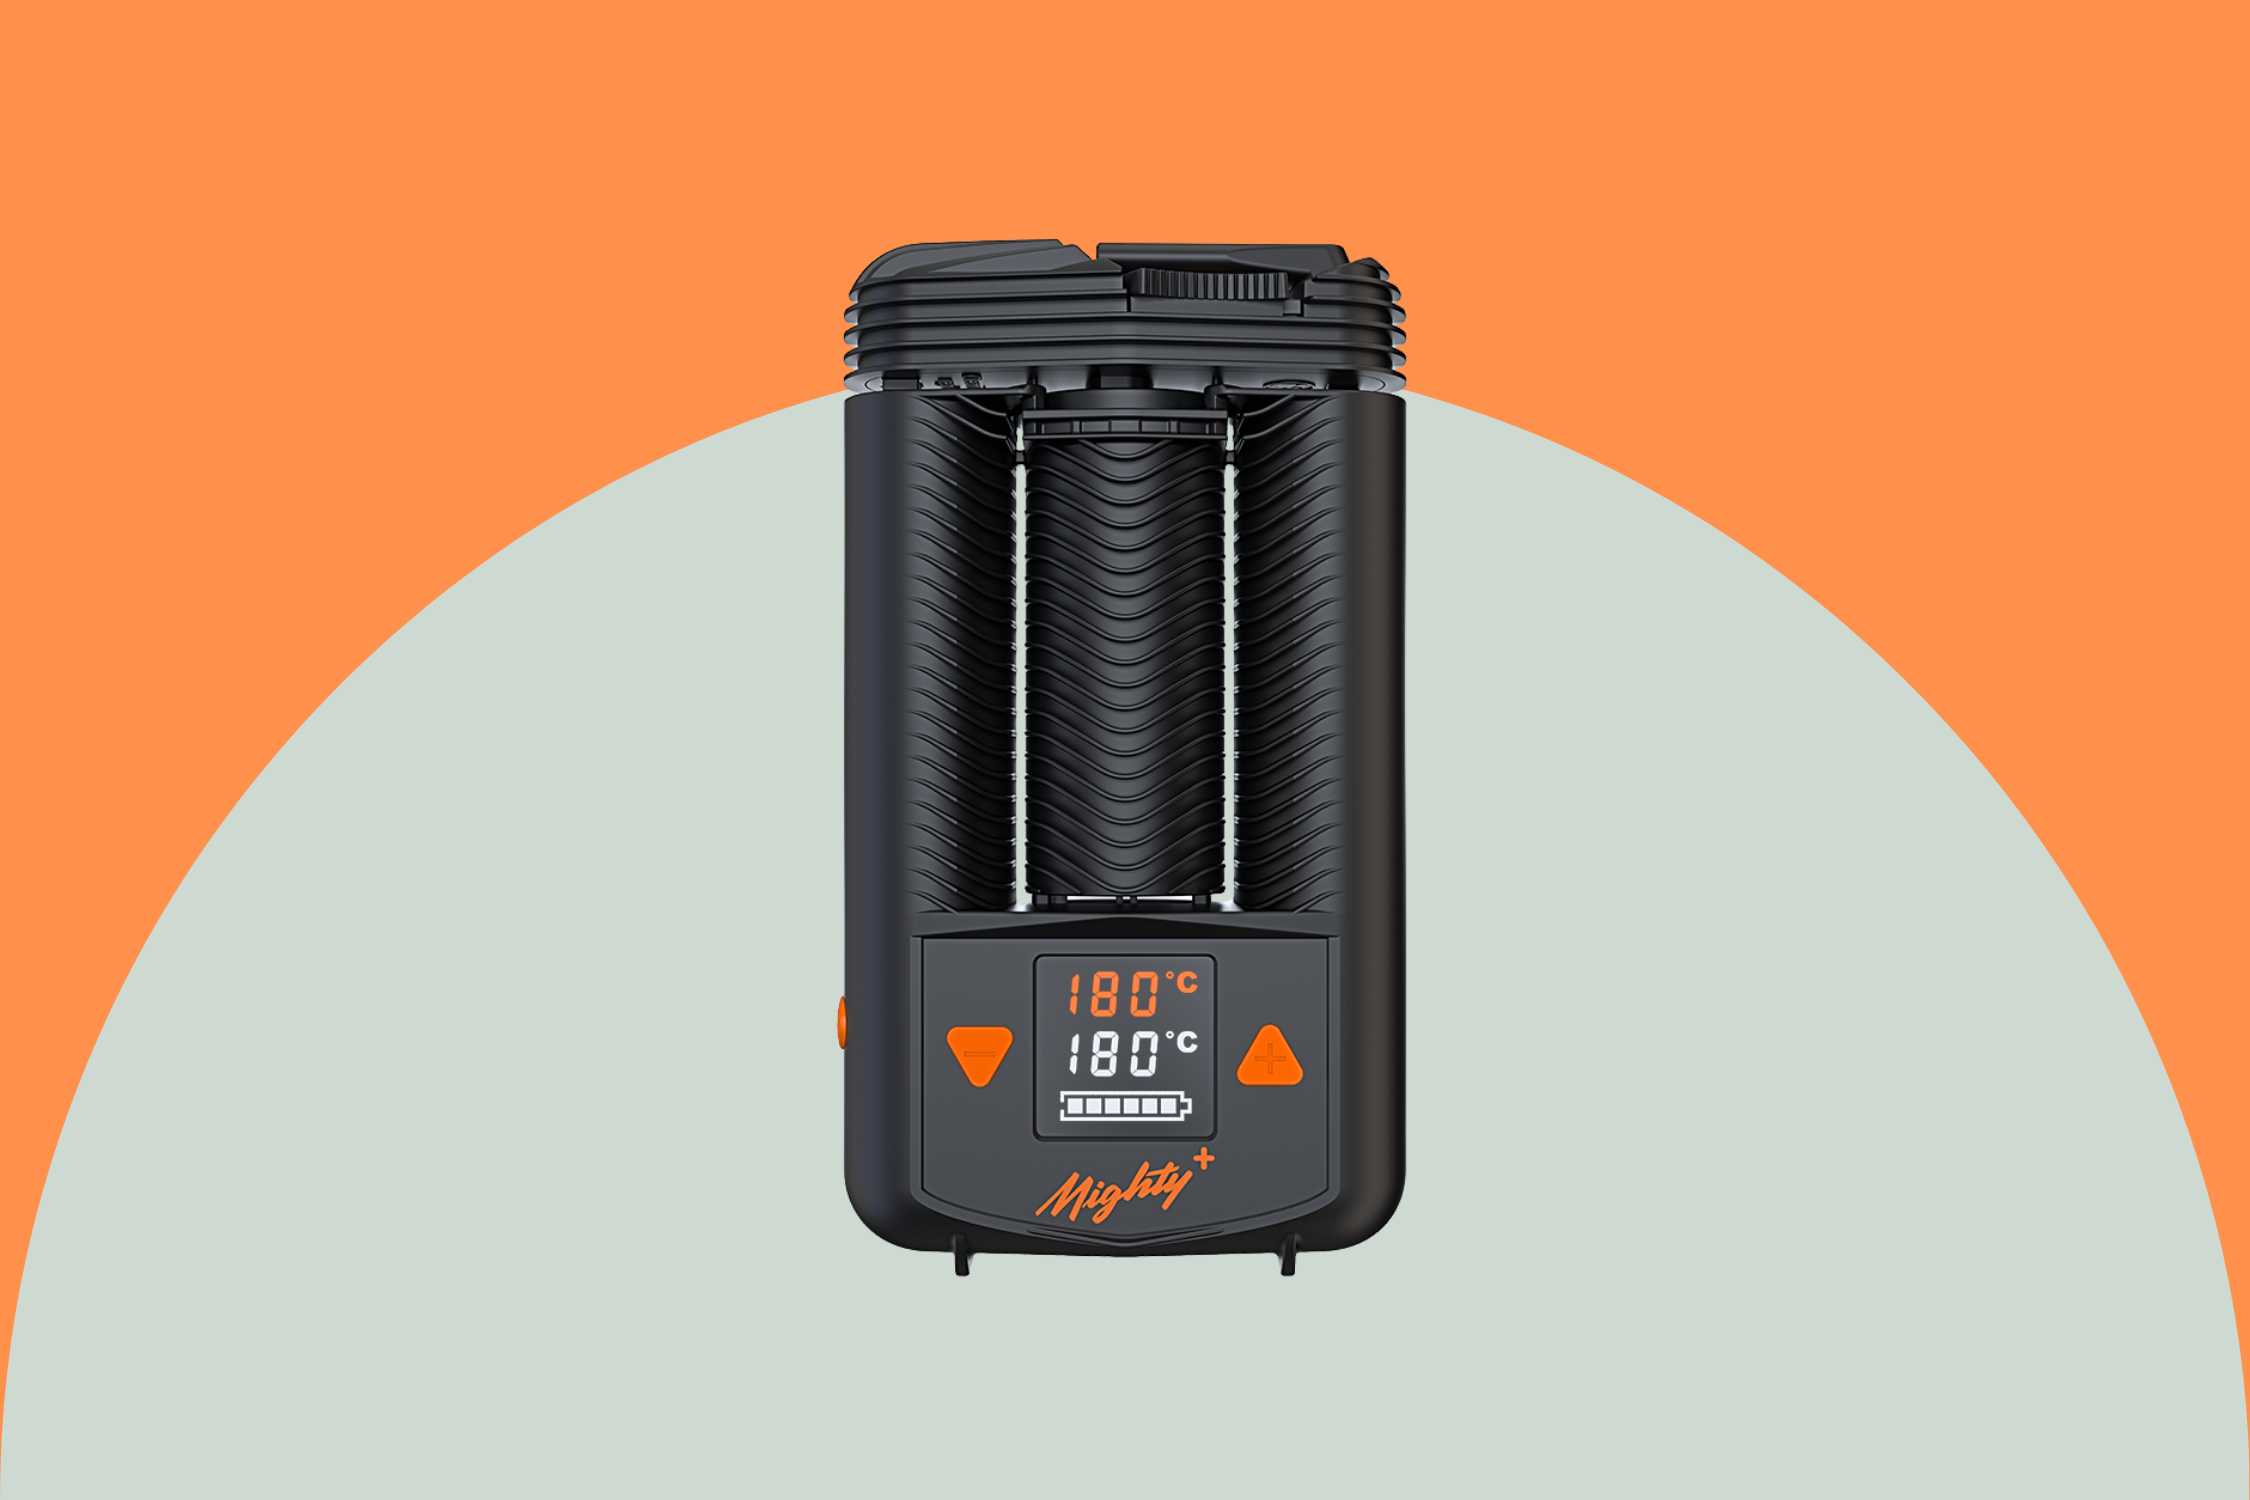
Mighty+ Medic Review: Must-Read Guide

The Mighty+ Medic has built a strong reputation as one of the premium portable vaporisers available to Australian medicinal cannabis patients, but with a considerably higher price than many alternatives, the obvious question is whether it is actually worth paying for.

In our Mighty+ Medic review, we are looking beyond the specifications to assess what those features mean in day-to-day use.

By the end of this article, you’ll know exactly whether the Mighty+ Medic is the right vaporiser for your needs.

Mighty+ Medic Review: Our Verdict

The Mighty+ Medic is one of the easiest portable vaporisers for us to recommend to patients who care more about consistency, vapour quality and straightforward operation than having the smallest or cheapest device.

Its biggest strength is how little effort it takes to get a good result. The hybrid heating system extracts material evenly, while the cooling unit helps keep vapour comfortable even at higher temperatures. That makes the Mighty+ Medic particularly forgiving for newer patients who do not want to think about draw speed, stirring or other techniques every time they use it.

The trade-off is size, price and an ageing battery design. It is bulky compared with many newer portable vaporisers, takes around a minute to heat up and uses internal batteries that cannot be replaced by the user.

For us, the premium price makes sense if you plan to use your vaporiser regularly and value predictable performance over maximum portability.

Best for: Regular medicinal cannabis patients who prioritise consistent vapour quality, ease of use and strong portable performance.

Consider another option if: Pocketability, faster heat-up, replaceable batteries or a lower upfront cost matter more.

Mighty+ Medic Pros and Cons

Pros

  • Consistent performance: Produces even extraction without requiring much technique or regular stirring.
  • Excellent vapour cooling: The dedicated Cooling Unit helps make higher-temperature sessions more comfortable.
  • Simple temperature control: Adjust the temperature directly on the device in 1°C increments without an app.
  • Strong battery capacity: Dual internal batteries support multiple sessions between charges.
  • Useful Dosing Capsules: Make preparing, carrying and loading individual sessions easier.
  • TGA-listed medical device: Specifically approved for supply as a medicinal cannabis vaping device in Australia.
  • Easy to use: A relatively low learning curve makes it well suited to patients who value predictable results.

Cons

  • Expensive: The benefits need to matter enough to justify the premium price.
  • Bulky: At 242 g, it is better suited to a bag than a pocket.
  • Non-replaceable batteries: The internal cells cannot simply be swapped out when they degrade.
  • Heat-up is no longer especially fast: Around a minute is manageable, but newer devices can be ready much sooner.
  • Cooling Unit requires maintenance: The longer vapour path collects residue and needs periodic cleaning.
  • Not especially discreet: Its size and distinctive design make it more noticeable than smaller portable vaporisers.

Mighty+ Medic At A Glance

Feature Detail
Type Portable dry herb vaporiser for prescribed medicinal cannabis flower
Heating Hybrid convection and conduction with a ceramic-coated Filling Chamber
Temperature range 40°C to 210°C, adjustable in 1-degree steps
Display LC display with on-device temperature controls
Heat-up time Around 60–70 seconds to reach 180°C
Boost modes Boost adds 15°C and Superboost adds 30°C to the set temperature
Battery Two built-in lithium-ion batteries
Charging USB-C with USB-C Power Delivery support
Supercharging Up to 80% charge in around 40 minutes with a compatible 45 W Supercharger
Airflow Up to 10 litres per minute
Cooling Removable Cooling Unit with an extended internal vapour path
Dosing Capsules Compatible; approximately 150 mg capacity depending on grind and packing
Body 14 × 8 × 3 cm and approximately 242 g
Medical status TGA-approved and included on the ARTG as a Class IIb medical device, ARTG 525733
In the box Device, USB charger, USB-C cable, spare screens, spare seal rings and magazine with 8 Dosing Capsules
Warranty Two years, with an additional year available after product registration
Price $599 RRP, currently available from CannaDash for $515


How we assessed the Mighty+ Medic

This review draws on the manufacturer’s published specifications and the established performance characteristics of the device, combined with our experience helping Australian patients choose portable dry herb vaporisers.

Individual experiences can vary depending on temperature settings, grind consistency and personal preference.

This review focuses on the factors most consistently relevant to patients choosing a device, including heat-up, vapour quality, ease of use, battery and upkeep.

What Is the Mighty+ Medic Like to Use?

One of the Mighty+ Medic’s biggest strengths is that it is difficult to get wrong.

The controls are simple, the chamber is easy to load and the device does not require much technique to produce consistent vapour.

For us, that ease of use is a major part of the value.

A premium medical vaporiser should not require constant adjustment or experimentation, and the Mighty+ Medic keeps the process predictable from one session to the next.

Setting Up and Loading the Mighty+ Medic

The Filling Chamber can be loaded directly with ground dry herb, or you can use Storz & Bickel Dosing Capsules.

Direct loading gives you more flexibility over how much material you use.

Dosing Capsules are more convenient if you want to prepare sessions in advance, reduce mess and make loading easier away from home.

Once loaded, operation is straightforward.

Switch the device on, select your target temperature using the physical buttons and wait for it to reach temperature. There is no app, bluetooth connection or complicated menu system.

For newer patients, we think this simplicity matters more than having extra customisation features they may never use.

Heat-Up Time

The Mighty+ Medic takes roughly 60–70 seconds to reach 180°C.

That is noticeably quicker than the original Mighty Medic, but it is no longer especially fast compared with newer portable vaporisers.

We do not see this as a major drawback for most users because the Mighty+ Medic is designed around full sessions rather than quick individual draws.

If you usually sit down for several minutes, the wait is relatively minor.

If your priority is taking one or two quick draws with almost no preparation time, there are faster options.

Draw Resistance and Airflow

The Mighty+ Medic has relatively open airflow, which means you do not need to pull particularly hard to produce vapour.

This makes longer sessions more comfortable and reduces the need to concentrate on drawing at exactly the right speed.

Combined with the hybrid heating system, it gives the device a natural, forgiving feel that suits patients who want predictable performance rather than something they need to master.

Boost and Superboost Modes

Boost raises the selected temperature by 15°C, while Superboost raises it by 30°C.

These modes are most useful later in a session when vapour production begins to fall.

Rather than manually increasing the temperature several times, you can quickly step the heat up and extract more from the remaining material.

We would not call them essential features, but they make temperature stepping easier and help keep the device simple to operate.

Vapour Quality and Performance

Vapour performance is where we think the Mighty+ Medic earns most of its reputation.

Plenty of portable vaporisers can reach similar temperatures, but the Mighty+ Medic is particularly good at producing consistent, comfortable vapour without asking much from the user.

Its hybrid heating system combines conduction, which heats material through contact with the chamber, with convection, which passes heated air through the material as you draw.

The practical benefit is more even extraction with less reliance on perfect packing, drawing technique or stirring.

For a patient, that consistency matters.

You are less likely to have one session perform well and the next feel noticeably weaker because your technique changed slightly.

Vapour Temperature and Cooling

The Cooling Unit is one of the features we think makes the biggest practical difference.

Instead of sending vapour directly from the chamber to the mouthpiece, it routes vapour through a longer internal pathway before inhalation.

This gives it more time to cool.

The result is that higher-temperature sessions remain more comfortable than they can on smaller vaporisers with short vapour paths.

That does not mean every draw feels completely cool, particularly near the upper end of the temperature range, but we think the Mighty+ Medic manages heat particularly well for a portable device.

For patients who find hot or harsh vapour uncomfortable, this is one of its strongest selling points.

Vapour Density and Flavour

The Mighty+ Medic can produce dense vapour without requiring particularly aggressive draws.

At lower and mid-range temperatures, flavour is generally cleaner and more noticeable.

As you increase the temperature, vapour becomes denser and extraction increases, while flavour naturally becomes less pronounced.

This gives you flexibility depending on how you prefer to use the device.

You can begin lower and gradually increase the temperature, or start higher if stronger extraction is the priority.

How Evenly Does It Extract?

One of the most useful benefits of the hybrid system is that the Mighty+ Medic generally extracts material evenly without requiring regular stirring.

With some portable vaporisers, users need to stop midway through a session, open the chamber and redistribute the material to avoid uneven heating.

The Mighty+ Medic largely removes that interruption.

It is also forgiving of small differences in draw speed and packing.

You can still fine-tune how you load and use it, but you do not need a highly specific technique to get reliable performance.

That ability to make high-quality vapour easy to reproduce is, in our view, one of the main reasons the Mighty+ Medic commands a premium price.

Battery Life, Charging and Portability

The Mighty+ Medic uses two internal lithium-ion batteries, giving it enough capacity for multiple sessions before you need to recharge.

Exact runtime depends on temperature and session length, but we think the battery capacity is strong enough for most regular users to get through normal day-to-day use without constantly looking for a charger.

That extra battery capacity contributes to the device’s size.

At approximately 242 g and 14 × 8 × 3 cm, we would describe the Mighty+ Medic as transportable rather than genuinely pocketable.

It is easy enough to carry in a bag, backpack or case, but there are better options if discretion or all-day pocket carry is the priority.

For us, that size is an understandable trade-off.

The larger body accommodates the dual batteries and substantial Cooling Unit that help give the Mighty+ Medic its strong runtime and comfortable vapour.

USB-C and Supercharging

The move to USB-C is one of the biggest improvements over the original Mighty Medic.

With a compatible 45 W USB-C Power Delivery charger, the Mighty+ Medic can reach approximately 80% charge in 40 minutes.

You can also charge it from lower-powered USB sources, although charging will take longer.

Fast top-ups make the dual-battery design much easier to live with if you use the device frequently.

Can You Use It While Charging?

Yes, provided the device is connected to a sufficiently powerful USB-C Power Delivery source. Storz & Bickel specifies 15 V at 3 A, with a 45 W charger recommended.

That means not every phone charger will provide enough power for pass-through operation when the battery is depleted.

We see this as a useful backup rather than a feature most users need to rely on every day.

The Main Battery Drawback

The batteries are built into the device.

You cannot carry a spare cell and swap it in when the charge runs out, and once the batteries eventually degrade, replacement needs to be handled through Storz & Bickel.

For a premium portable vaporiser, we think that is a genuine weakness.

If replaceable batteries are important to you, we would consider another device.

If strong day-to-day runtime and fast USB-C charging matter more, the Mighty+ Medic still performs well.

Dosing Capsules: Are They Worth Using?

For most patients, we think Storz & Bickel Dosing Capsules are one of the most useful accessories for the Mighty+ Medic.

Each aluminium capsule holds approximately 150 mg of ground plant material, although the exact amount varies depending on grind and packing.

The main benefit is convenience. You can prepare capsules ahead of time and swap them into the device without handling loose herb every time you want a session.

They can also:

  • Reduce mess in the Filling Chamber
  • Make loading away from home quicker
  • Help you prepare similar quantities from one session to the next
  • Reduce the amount of cleaning required inside the chamber

There can be a small performance difference compared with loading directly into the Filling Chamber because the capsule adds another layer between the material and heater.

In practice, we think the convenience outweighs that trade-off for most medicinal users.

One point worth knowing is that Storz & Bickel currently classifies its medical Dosing Capsules as single-use components.

Patients should follow the instructions supplied with their device and any guidance from their healthcare professional.

Overall, Dosing Capsules do not improve vapour quality directly, but they make preparing, transporting and maintaining the Mighty+ Medic easier, which is valuable if you use it regularly.

Cleaning and Maintenance

The Mighty+ Medic is reasonably easy to maintain, particularly if you use Dosing Capsules, but the Cooling Unit does require periodic cleaning.

Most residue builds up through the vapour pathway rather than deep inside the device.

Over time, this can restrict airflow, affect flavour and reduce vapour performance.

For us, the maintenance requirement is a fair trade-off.

The Cooling Unit takes more effort to clean than the simpler mouthpieces found on some compact vaporisers, but that same extended vapour path is a major reason the Mighty+ Medic produces cooler, more comfortable vapour.

Using Dosing Capsules can also reduce the amount of material that reaches the Filling Chamber, making regular upkeep easier.

We would not describe cleaning as a major weakness. You need to stay on top of residue build-up, but the process is manageable.

For the full process, including how to disassemble and clean the Cooling Unit safely, read our guide on how to clean the Mighty+ Medic vaporiser.

Is the Mighty+ Medic Worth the Money?

For the right patient, we think the Mighty+ Medic is worth the premium.

You are not paying for one standout specification.

The value comes from how several features work together to make the device more consistent and easier to use.

The hybrid heating system reduces the amount of technique required for even extraction. The Cooling Unit makes higher-temperature sessions more comfortable.

The dual-battery setup provides enough runtime for regular use, while USB-C charging makes the device easier to keep topped up.

Taken individually, none of those features fully explain the price.

Together, they create a vaporiser that asks relatively little from the user.

That is the real selling point for us.

The Mighty+ Medic is particularly easy to justify if you plan to use it regularly and want something that performs predictably without constant adjustment, stirring or experimentation.

It offers less compelling value if you only vaporise occasionally, primarily care about pocketability or simply want the lowest-cost option available.

What Are You Actually Paying For?

In our view, the extra money mainly buys you:

  • Consistency: Reliable extraction without needing to perfect your technique.
  • Comfort: A substantial Cooling Unit that helps manage vapour temperature.
  • Ease of use: Simple controls and a relatively low learning curve.
  • Battery capacity: Enough runtime to suit regular use.
  • Build quality: A proven Storz & Bickel design manufactured in Germany.
  • Medical-device certification: A device specifically developed and approved for medicinal cannabis use.

Who We Think It Is Best For

We would recommend the Mighty+ Medic if you:

  • Use a vaporiser regularly
  • Value consistent, comfortable vapour
  • Want something straightforward to operate
  • Prefer one device that can be used both at home and away
  • Want a medically certified vaporiser approved for supply in Australia

We would consider another option if you:

  • Want something small enough for discreet pocket carry
  • Prefer replaceable batteries
  • Need almost instant heat-up
  • Only use a vaporiser occasionally
  • Are primarily shopping on price
  • Mainly use your vaporiser at home and would benefit more from a desktop device

The Mighty+ Medic is not the newest, lightest or fastest portable vaporiser available.

What keeps it competitive is how reliably all of its core features work together.

If consistency, comfort and ease of use matter more to you than compact size or low cost, we think the Mighty+ Medic still justifies its premium better than the specifications alone might suggest.

If you’d like to buy online, shop the Mighty+ Medic or browse our full range of dry herb vaporisers at CannaDash. If you’re still comparing options, visit our Knowledge Hub to learn more about vaporisation before you decide.


CannaDash does not promote the use of natural medicines. Content on this website is for informational purposes only. For medical advice, please consult with your doctor. All medicines in Australia are regulated by the Therapeutic Goods Administration (TGA).
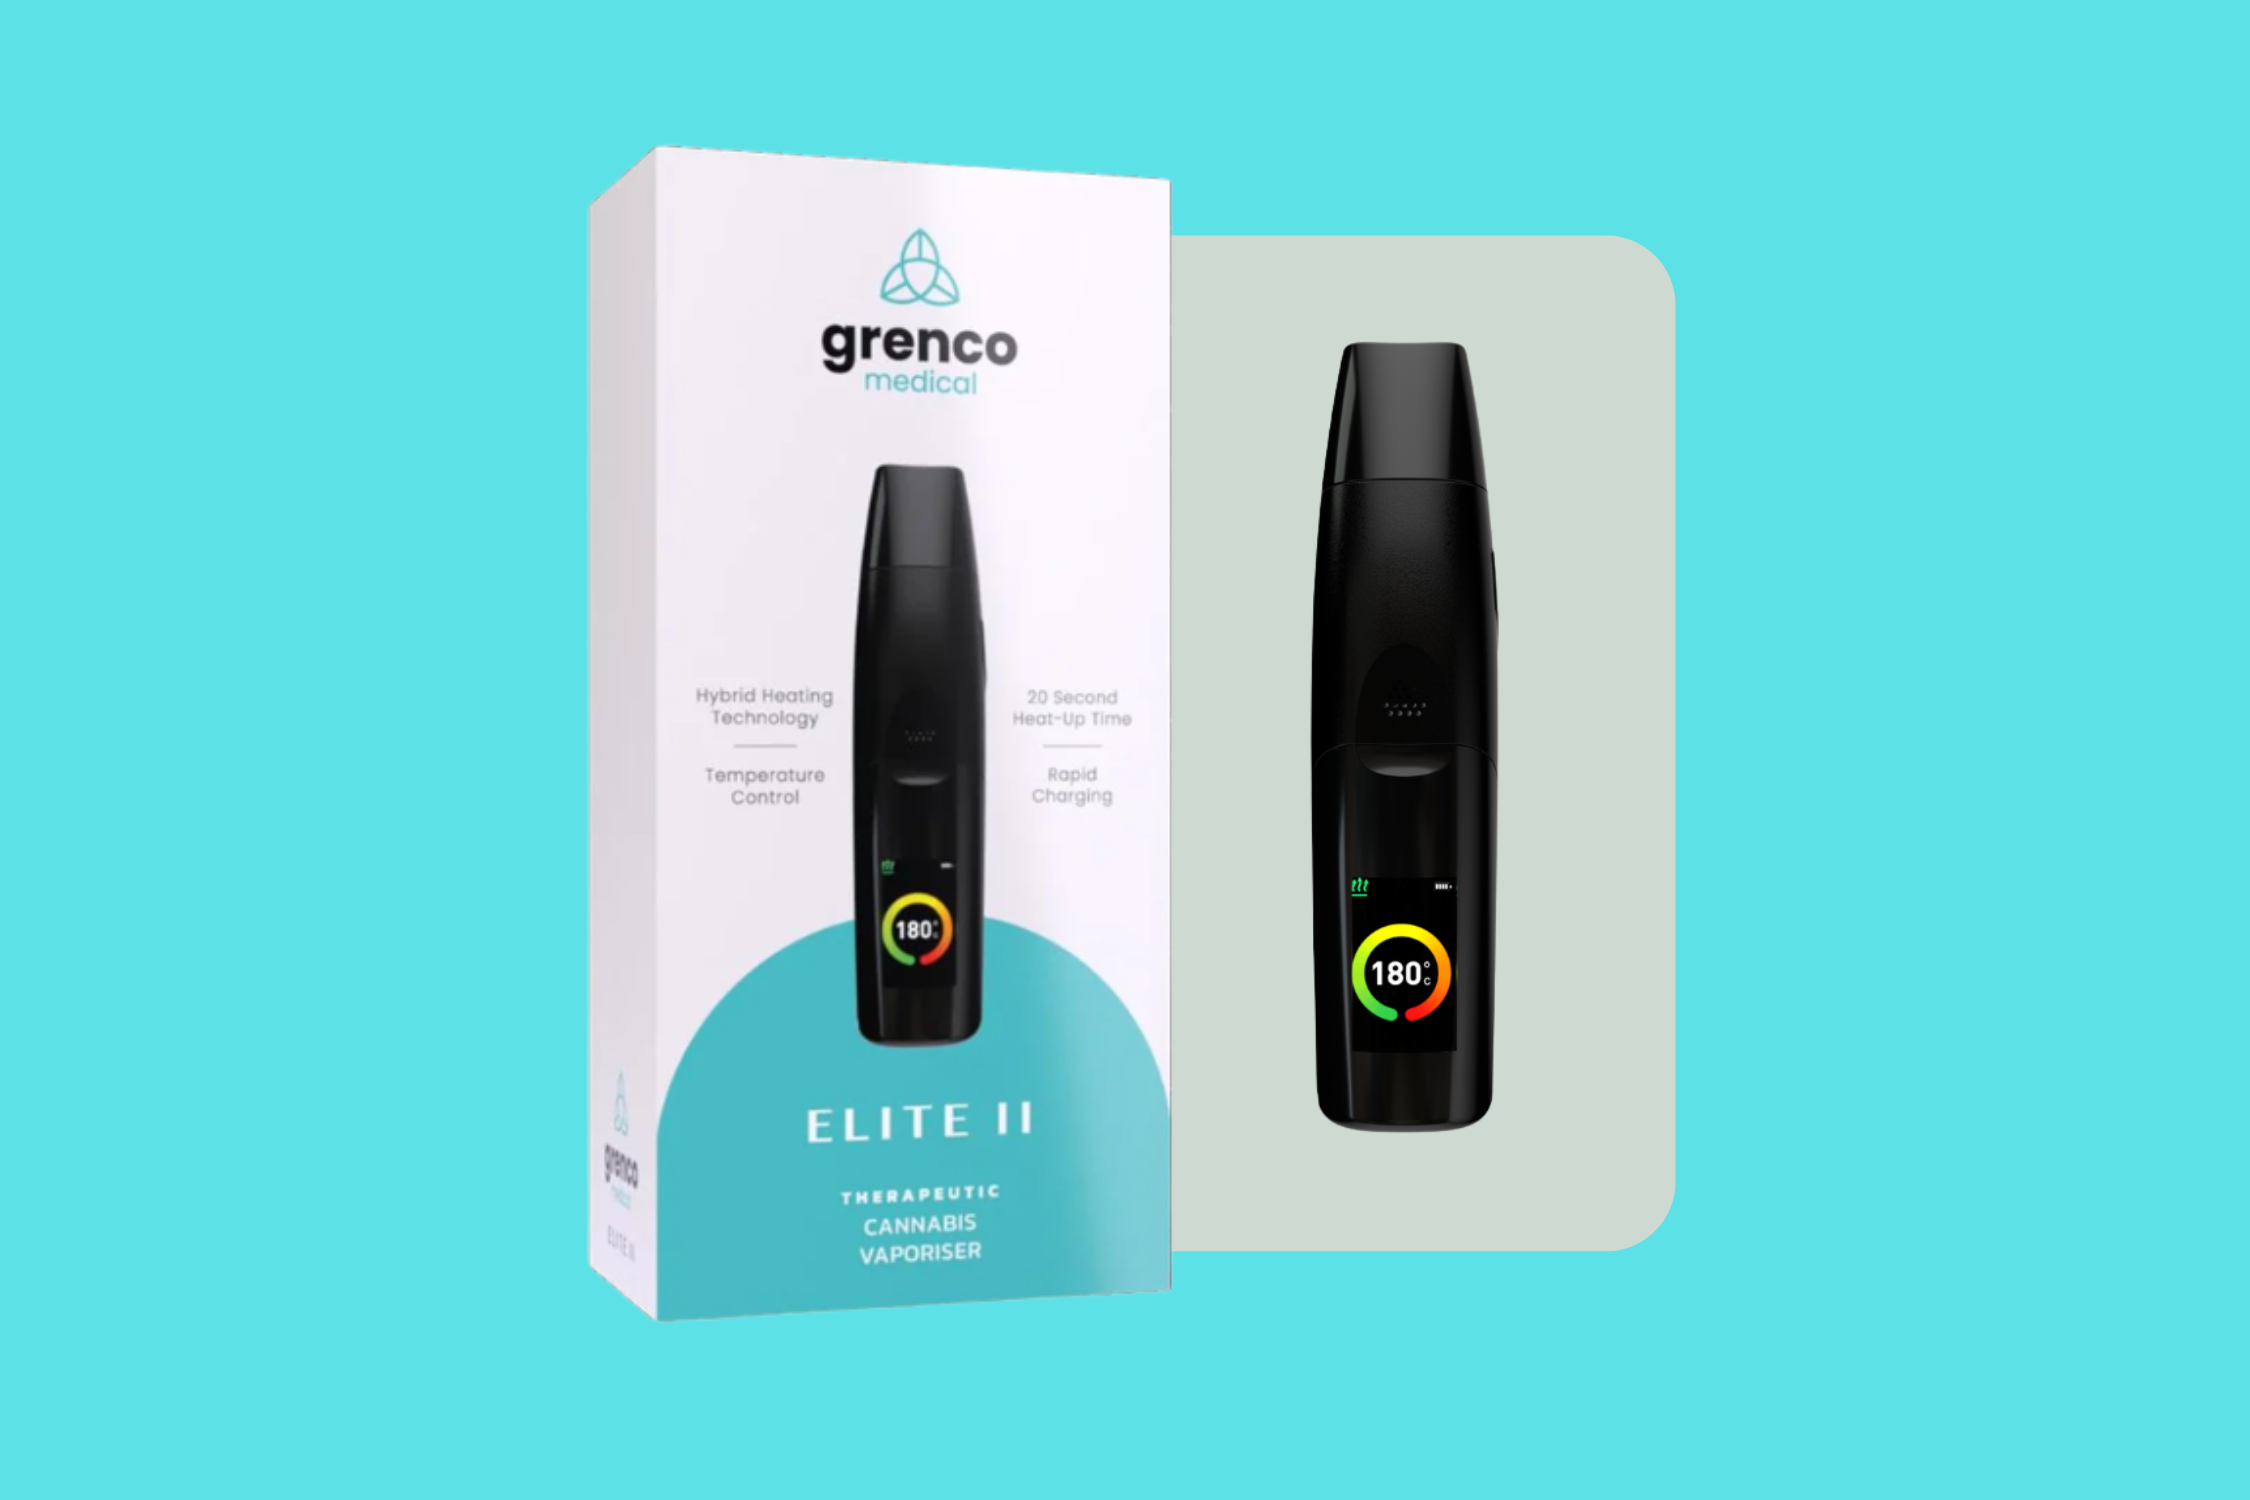
Grenco Medical Elite II Review

The new TGA-approved Grenco Medical Elite II is a compact, portable dry herb vaporiser built to medical device standards. It combines precise temperature control with a cool, comfortable draw and straightforward operation.

It suits patients who value something simple, discreet, and easy to handle rather than the largest or most powerful device on the shelf.

If that sounds like you, it is one of the best options currently available in Australia.

If you’re new to prescribed medicinal cannabis, the first thing to understand is the difference between smoking and vaporising.

A dry herb vaporiser gently heats prescribed dried flower to release an inhalable vapour, without burning it the way smoking does.  No combustion occurs, so fewer toxins are produced.

This controlled heating process is the whole point of the device. Temperature control matters so much because it influences the profile of cannabinoids and terpenes released from the dried flower, which may affect the therapeutic effects experienced.

At CannaDash we stock the Grenco Medical Elite II and regularly help patients work out whether a particular device best suits their needs.

This review walks through what the device is, what it is like to use day to day, its approval status, and who it suits best.

Grenco Medical Elite II at a glance

The Grenco Medical Elite II is a handheld dry herb vaporiser designed for use with prescribed dried flower only. It is not intended for oils or concentrates. The focus is on controlled, repeatable vaporisation in a device small enough to carry and simple enough for dosing as per your prescriber’s directions.

Feature Detail
Type Portable dry herb vaporiser for dried flower only
Heating Dual convection and conduction with a full ceramic chamber
Temperature range 93 to 221 degrees C, adjustable in 1-degree steps
Display Full-colour screen with vibration feedback
Heat-up time Around 15 to 20 seconds
Battery 2100 mAh, USB-C charging, roughly 60 minutes of use per charge
Charge time About 1.5 hours
Mouthpiece Magnetic zirconia with an internal cooling spiral
Body Zinc-alloy, around 156 g, silicone sleeve included
In the box Device, hemp travel case, silicone sleeve, USB-C cable, pick tool
Warranty Two-year product warranty
Price $449 RRP, but CannaDash offers the Grenco Medical Elite II for $434

 How we assessed the Grenco Medical Elite II

This review draws on the manufacturer’s published specifications and the established performance characteristics of the device, combined with our experience helping Australian patients choose portable dry herb vaporisers.

Individual experiences can vary depending on temperature settings, grind consistency and personal preference. This review focuses on the factors most consistently relevant to patients choosing a device, including heat-up, vapour quality, ease of use, battery and upkeep.

Key features and what they mean for you

Dual heating with a full ceramic chamber

The Elite II uses both convection and conduction heating within a full ceramic chamber, together with a patented clean-air intake pathway.

In plain terms, this means more even heating of the dried flower rather than exposing it to concentrated hot spots, which reduces the chance of combustion occurring.

The air you intake is also kept away from the device’s electronics, contributing to a purer vapour quality. The device reaches the selected temperature within seconds for minimal waiting time.

Precise temperature control from 93 to 221 degrees

Rather than a few fixed presets, the Elite II lets you set an exact temperature in single-degree steps. This means you can dial in the setting your prescribing practitioner suggests and return to exactly that number every time, and adjust it to change how the vapour feels (see Finding your temperature below).

Zirconia mouthpiece with a cooling spiral

The mouthpiece routes vapour through an internal spiral that cools it on the way to your lips. Grenco Medical states the mouthpiece contact temperature stays around 40 to 41 degrees, and the inhaled vapour peaks below 50 degrees. For you, that means draws feel cool rather than hot on the throat, so they are more comfortable and less likely to make you cough.

Adjustable airflow

A small built-in airflow control allows you to adjust the resistance of each draw to suit your preference. The device is designed for slow and steady inhalation, keeping each inhale smooth.

Magnetic loading and haptic feedback

The lid and mouthpiece are magnetic and click off without tools, and the device buzzes to signal when it is ready. This makes loading straightforward, including for patients with reduced dexterity or limited grip.

Built-in safety features

According to the manufacturer, the device shuts off automatically if its internal temperature reaches 53 degrees and restarts only once it has cooled, and its battery carries UN 38.3 transport-safety certification. Combined with the cool-touch mouthpiece, this makes it reassuring to set up for a patient who is new to vaporising.

USB-C charging and a travel case

The Elite II charges over USB-C from a standard 5-volt adapter, and the included hemp case keeps the device and cable together and discreet.

What the Grenco Medical Elite II is like to use

Loading and setup

Loading is simple. First, grind your prescribed dried flower to a medium to fine texture. Lift off the magnetic mouthpiece, add the ground flower to the ceramic chamber, and click the mouthpiece back on. Filling the chamber rather than under-packing it helps the material heat evenly. A pick tool is included for packing and clearing. The menu and buttons take a session or two to learn, so it is worth reading the instructions once before your first use.

Note: A small grinder makes this easy but is not included in the box. Shop our vaporiser accessories to find the right grinder for you

Heat-up

The Elite II reaches temperature quickly, in around 15 to 20 seconds. As with most dry herb devices, the best draws come a few moments after it signals ready, once the heat has settled into the material.

Finding your temperature

The wide range from 93 to 221 degrees is there so you can shape each session. As a general guide, lower temperatures produce lighter, cooler and more flavourful vapour, while higher temperatures produce thicker, denser vapour and draw more from each load. You can change the temperature at any point during a session, so a common approach is to start low and step it up as you go to get the most from the material. If your prescribing practitioner has suggested a setting, the single-degree control makes it easy to return to exactly that number.

Vapour and flavour through a session

Inhalations are cool and smooth, helped by the cooling spiral. The chamber is compact, holding around 0.2 g, roughly a small pinch and enough for one short session, and up to about half a gram when packed tightly. This makes it a device for shorter, measured sessions rather than long, continuous ones. Vapour and flavour are at their fullest through the first several draws and become lighter as the material is spent, which is normal for a device of this style. Emptying the chamber after each session keeps the next one tasting fresh.

Battery and charging in daily use

The battery gives roughly 60 minutes of use per charge, which works out to about five to six short sessions. A full charge over USB-C takes about 1.5 hours. That is comfortable for light to moderate daily use. Patients who vaporise heavily throughout the day should expect to charge more often, and it is worth noting that the battery is built-in rather than user-replaceable.

Cleaning and upkeep

Cleaning is simple, but doing it regularly matters. As residue builds up, draws become harsher and more restricted, and the flavour drops off, so a quick clean keeps performance consistent. Remove the cooling spiral and screen, soak them in isopropyl alcohol, then wipe out the chamber and mouthpiece. Emptying the chamber after each session and keeping the screen clear are the two habits that make the biggest difference.

Carrying it around

At around 156g and pocket-sized, the Elite II is easy to carry. The silicone sleeve adds grip and protection, and the hemp case keeps everything together for travel. Because it vaporises rather than burns, it produces far less odour than smoking, and what there is fades quickly, which helps if you value discretion.

Who the Grenco Medical Elite II suits

It is a strong fit if you want a compact, discreet device that is easy to load and hold, value precise temperature control, and prefer shorter, measured sessions. The comfortable cool draw and simple magnetic loading also make it a good option for patients who are newer to vaporising or who have reduced dexterity.

You may prefer a different device if you vaporise frequently across the whole day and want the longest possible battery life, or if you want to load large amounts at once. The Elite II is designed around portability and ease rather than maximum capacity or all-day runtime.

If the above describes you, another TGA-approved option is the Storz & Bickel Mighty+ Medic. It offers longer battery life and holds larger loads, so it suits patients who vaporise frequently through the day or want fewer reloads.

The trade-offs are size and price. It is noticeably bigger and heavier, so it is less pocketable and less discreet to carry, and at $545, it costs more than the Elite II at $449 (Note: CannaDash offers the Mighty+ Medic for $489). For patients who want a compact, easy-to-carry device, the Elite II remains the better fit.

Is the Grenco Medical Elite II worth it?

For the right patient, yes. The price reflects a certified medical-grade device with precise temperature control, a comfortable draw, and a two-year warranty backed by Australian registration and support. If you want an approved, portable device that is easy to use and easy to carry, it earns its place.

The manufacturer also reports durability testing equivalent to several years of daily use, which helps justify the outlay over the life of the device.

Be realistic about the fit. The Elite II is built for light to moderate use and shorter sessions. If that suits your needs, it offers good value. If you require frequent or extended use throughout the day, weigh that up before you buy.

Considering the Grenco Medical Elite II?

If a compact, easy-to-use dry herb vaporiser fits how you have been prescribed to vaporise, the Grenco Medical Elite II is worth a close look.

Browse the Grenco Medical Elite II and our full range of dry herb vaporisers at CannaDash, or visit our Knowledge Hub to learn more about vaporisation before you decide.


CannaDash does not promote the use of natural medicines. Content on this website is for informational purposes only. For medical advice, please consult with your doctor. All medicines in Australia are regulated by the Therapeutic Goods Administration (TGA).
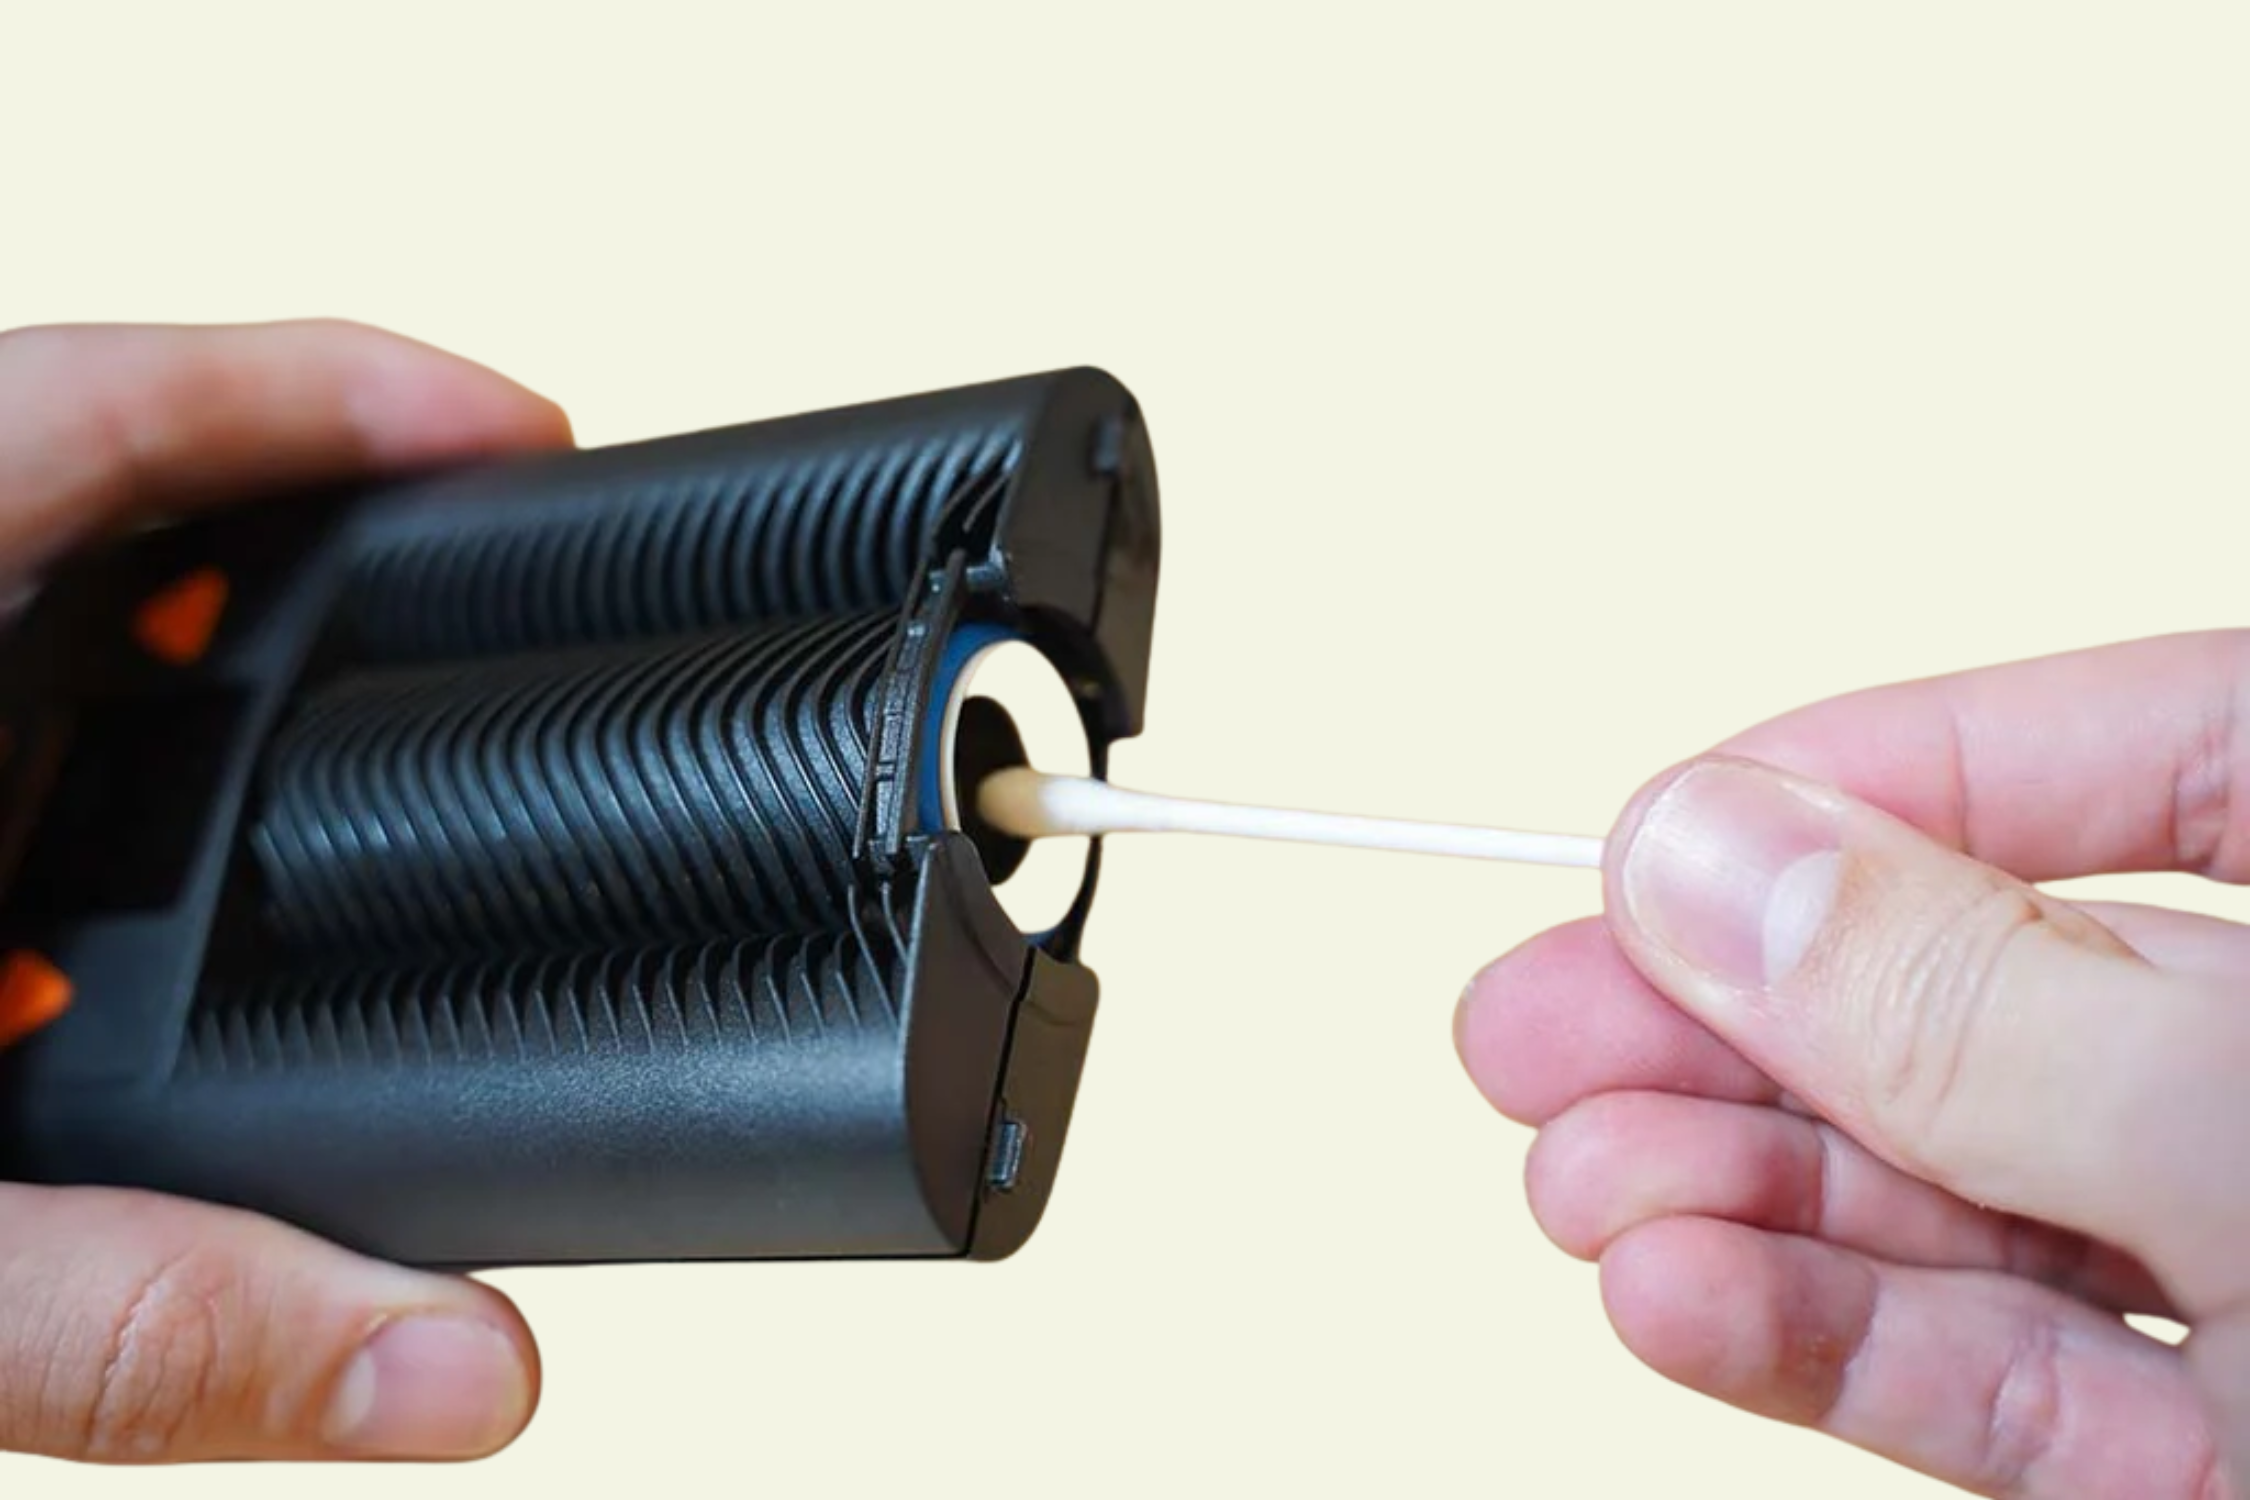
How to Clean the Mighty+ Medic Vaporiser: Step-by-Step Guide

If your Mighty+ Medic feels harder to draw from, tastes stale or produces less vapour than usual, it may be due for a clean. Over time, residue can build up inside the cooling unit, mouthpiece, screens and filling chamber, which can affect airflow, flavour and overall performance.

The good news is that cleaning the Mighty+ Medic is straightforward once you know which parts can be removed, which parts can be soaked and which parts need to stay dry.

This guide walks you through how to clean your Mighty+ Medic safely, how often to clean it, which mistakes to avoid and when small parts may need replacing.

If you are new to dry herb vaporisers, you can also browse CannaDash’s dry herb vaporiser range or visit the CannaDash Knowledge Hub for more product guides and educational resources.

Why Cleaning Your Mighty+ Medic Matters

Regular cleaning helps keep your Mighty+ Medic performing as intended. It can help with:

  • Better airflow
  • Cleaner flavour
  • More consistent vapour production
  • Reduced draw resistance
  • Easier loading and emptying
  • Longer-lasting small parts
  • Better overall device performance

Most cleaning issues come from residue inside the cooling unit or clogged screens. A quick brush after use and regular deep cleaning can make a noticeable difference.

How Often Should You Clean the Mighty+ Medic?

The right cleaning schedule depends on how often you use your vaporiser and whether you use dosing capsules.

Use Level Light Cleaning Deep Cleaning
Occasional use Brush the chamber after each use Every 3–4 weeks or when residue appears
Regular use Brush the chamber after each use Every 1–2 weeks
Daily or heavy use Brush the chamber after each use Weekly or when airflow changes

As a general rule, clean the cooling unit weekly or whenever you notice visible residue, restricted airflow, stale flavour or a sticky mouthpiece.

Signs Your Mighty+ Medic Needs Cleaning

Your device may be overdue for cleaning if you notice:

  • Restricted airflow
  • Increased draw resistance
  • Reduced vapour production
  • Bitter or stale flavour
  • Sticky mouthpiece
  • Visible residue inside the cooling unit
  • Clogged screens
  • Uneven extraction

If these issues appear, a thorough clean will often help restore normal performance.

What You Need Before You Start

Before cleaning your Mighty+ Medic, gather the following supplies:

Essential Supplies

  • 70% isopropyl alcohol, used according to the manufacturer’s guidance
  • Cotton buds
  • Paper towel
  • Warm water
  • Mild detergent, if using warm detergent water instead of alcohol
  • Mighty+ cleaning brush
  • Small container for soaking removable parts

Optional Replacement Parts

  • Replacement screens
  • Replacement O-rings
  • Replacement cooling unit
  • Replacement mouthpiece
  • Dosing capsules

These items are useful to keep on hand, especially if you use your Mighty+ Medic regularly. You can browse Mighty+ Medic accessories through CannaDash.

Before You Start: What Can and Cannot Be Soaked

One of the most important parts of cleaning the Mighty+ Medic is knowing which parts can be soaked and which parts must stay dry.

Can Usually Be Cleaned Separately Do Not Soak
Removable cooling unit parts Main Mighty+ Medic device body
Mouthpiece Heating chamber electronics
Screens USB-C charging port
Removable cooling unit housing Device housing
Some removable small parts, if cleaned gently Any non-removable electronic component

Only soak removable parts that are designed to be cleaned separately. Do not soak the main device body or allow liquid to enter the filling chamber, charging port or internal electronics.

Step-by-Step Mighty+ Medic Cleaning Guide

Follow these steps carefully to clean your Mighty+ Medic safely.

Step 1: Turn Off the Device and Let It Cool

Switch the Mighty+ Medic off completely and allow it to cool to room temperature.

Do not clean the device while it is hot. This reduces the risk of burns and helps protect the device components.

Step 2: Remove the Cooling Unit

Twist the cooling unit approximately a quarter turn and lift it away from the filling chamber.

Place the main device body aside in a safe, dry location.

Step 3: Empty and Brush the Filling Chamber

Remove any remaining dry herb from the chamber.

Use the included cleaning brush to remove loose particles from:

  • Filling chamber
  • Chamber rim
  • Screen area

A quick brush after each session is one of the easiest ways to reduce build-up and make deep cleaning easier.

Step 4: Disassemble the Cooling Unit

Carefully separate the removable cooling unit parts. This may include:

  • Upper cooling unit housing
  • Lower cooling unit housing
  • Mouthpiece
  • Screens
  • O-rings or seal rings

Take note of how each part fits together before cleaning. This makes reassembly easier.

Clean small seals gently and inspect them for signs of wear, cracking or looseness. Replace them if they no longer sit properly.

Step 5: Soak Suitable Removable Parts

Place suitable removable cooling unit parts into a small container with 70% isopropyl alcohol.

Soak for a maximum of 30 minutes. Do not extend the soak time, especially for plastic components.

For heavier residue, use a cotton bud or soft brush after soaking rather than leaving parts in alcohol for longer.

Warm detergent water can also be used as an alternative cleaning method.

Step 6: Clean Screens and Airflow Channels

After soaking, use cotton buds or a soft brush to remove loosened residue.

Pay close attention to:

  • Fine mesh screens
  • Mouthpiece openings
  • Internal airflow channels
  • Areas where sticky residue has built up

Avoid aggressive scrubbing, as this can damage screens or small seals.

Step 7: Rinse Thoroughly

Remove the parts from the cleaning solution and rinse them thoroughly with warm water.

Make sure no alcohol, detergent or loosened residue remains on any component.

Step 8: Dry Completely

Place all cleaned parts on paper towel and allow them to air dry completely.

This step is important. Do not reassemble the Mighty+ Medic while moisture remains inside the cooling unit, mouthpiece or screens.

All cleaning vapours must fully evaporate before the device is used again.

Step 9: Reassemble the Cooling Unit

Once all components are fully dry, reassemble the cooling unit carefully.

Check that:

  • Screens sit flat
  • O-rings are seated correctly
  • The mouthpiece rotates properly
  • The cooling unit closes securely

If any part feels loose, damaged or difficult to fit, it may need replacing.

Step 10: Run the Device Empty Before Use

Once the device is fully dry and reassembled, run it empty at a high temperature before your next use.

This can help clear any remaining moisture or cleaning odour. Only use the device once all parts are dry and any cleaning vapours have evaporated.

How to Clean the Mighty+ Medic Cooling Unit

The cooling unit is where most residue collects. As vapour passes through the cooling pathway, oils and plant material can condense on the internal surfaces.

Over time, this residue can restrict airflow and affect flavour.

To clean the cooling unit:

  1. Remove it from the device.
  2. Separate the removable parts.
  3. Soak suitable parts in 70% isopropyl alcohol for no more than 30 minutes.
  4. Use cotton buds or a soft brush to remove residue.
  5. Rinse all parts thoroughly with warm water.
  6. Allow every part to dry completely before reassembly.

Regular cooling unit cleaning usually has the biggest impact on airflow and vapour quality.

How to Clean the Filling Chamber

The filling chamber requires more care than the cooling unit because it is part of the main device body.

After Each Session

Once the device has cooled:

  • Empty the chamber
  • Brush out loose material
  • Check the rim for residue
  • Keep the screen area clear

This simple habit can reduce the need for deeper cleaning.

Deep Cleaning the Filling Chamber

For stubborn residue:

  1. Hold the device upside down.
  2. Lightly dampen a cotton bud with isopropyl alcohol.
  3. Gently wipe the chamber walls and rim.
  4. Avoid using too much liquid.
  5. Allow the chamber to dry completely.

The cotton bud should be damp, not dripping.

Important Warning

Never pour alcohol directly into the filling chamber. Excess liquid can enter areas that are not designed for moisture and may damage the device.

Common Mighty+ Medic Cleaning Mistakes

Using Too Much Alcohol

Alcohol should be used carefully, especially near the filling chamber. When cleaning the main device body or chamber area, use only a lightly dampened cotton bud or cloth.

Soaking Parts for Too Long

Do not soak plastic parts for longer than recommended. For the cooling unit, follow the manufacturer’s maximum soak time of 30 minutes.

Reassembling While Wet

Moisture trapped inside the cooling unit can affect flavour and performance. Always let every part dry completely before reassembly.

Neglecting Screens

Dirty screens are one of the most common causes of restricted airflow. Clean them regularly and replace them when they become damaged or permanently clogged.

Scrubbing O-Rings Too Aggressively

Seal rings can wear over time. Clean them gently and replace them if they become cracked, flattened, loose or damaged.

Skipping a Dry Run

After cleaning, running the device empty at a high temperature can help clear remaining moisture or cleaning odour before use.

Troubleshooting: What Your Cleaning Issue Might Mean

Problem Likely Cause What to Do
Harder to inhale Residue in cooling unit or clogged screen Clean cooling unit and inspect screens
Weak vapour Restricted airflow or residue build-up Clean cooling unit and filling chamber
Stale flavour Dirty mouthpiece or cooling unit Deep clean removable parts
Sticky mouthpiece Resin build-up Soak and rinse suitable mouthpiece parts
Airflow still poor after cleaning Damaged screen, seal or cooling unit Replace worn parts or contact support
Cleaning smell remains Parts not fully dry Let parts dry longer and run the device empty

If cleaning does not improve performance, inspect the cooling unit, screens and seals. If parts are damaged or no longer fit securely, replacement parts may be needed.

When Should You Replace Mighty+ Medic Parts?

Even with regular cleaning, some parts naturally wear over time.

Screens

Replace screens if they become:

  • Bent
  • Torn
  • Permanently clogged
  • Difficult to clean
  • Loose or misshapen

O-Rings and Seals

Replace O-rings if you notice:

  • Cracking
  • Flattening
  • Air leaks
  • Loose fitting
  • Visible damage

Mouthpiece

Replace the mouthpiece if:

  • Rotation becomes loose
  • Cracks develop
  • Cleaning no longer restores it properly
  • It feels sticky or worn after cleaning

Cooling Unit

Consider replacing the cooling unit if:

  • Airflow remains restricted after cleaning
  • Plastic parts are damaged
  • Components no longer fit securely
  • Cleaning no longer restores normal performance

Keeping spare parts on hand can make maintenance easier and reduce downtime.

Tips to Keep Your Mighty+ Medic Cleaner for Longer

Empty the Chamber After Every Session

Leaving used material inside the chamber encourages residue build-up. Emptying it after each session makes cleaning easier.

Use Dosing Capsules

Dosing capsules can help reduce loose material and residue inside the filling chamber.

Benefits may include:

  • Less chamber contamination
  • Faster loading
  • Easier maintenance
  • More consistent amounts
  • Longer time between deep cleans

Brush Regularly

A quick brush after each session can dramatically reduce how often you need to deep clean the device.

Store It Properly

Keep your Mighty+ Medic in a clean, dry location. Avoid dusty environments, moisture and excessive heat.

Avoid Overpacking

Overfilled chambers can restrict airflow and increase residue build-up. Use an appropriate amount of dry herb and avoid packing the chamber too tightly.

FAQs About Cleaning the Mighty+ Medic

Can I soak the entire Mighty+ Medic?

No. Never soak the main Mighty+ Medic device body. Only suitable removable parts, such as the cooling unit components, should be cleaned separately.

Can I soak the cooling unit?

Yes, suitable removable cooling unit parts can be soaked according to the manufacturer’s instructions. STORZ & BICKEL recommends 70% isopropyl alcohol for a maximum of 30 minutes, or warm detergent water as an alternative.

Can I use water instead of alcohol?

Warm detergent water can be used as an alternative for cleaning removable cooling unit parts. Isopropyl alcohol is often more effective for sticky residue, but it must be used carefully and only on suitable removable parts.

How often should I clean my Mighty+ Medic?

Most users should brush the filling chamber after each session. The cooling unit should generally be cleaned weekly or when visible residue, restricted airflow or stale flavour appears.

Why does my Mighty+ Medic have restricted airflow?

Restricted airflow is often caused by clogged screens, residue in the cooling unit or build-up in the vapour pathway. Cleaning the cooling unit and inspecting the screens will often help.

Can cleaning improve vapour production?

Yes. Cleaning can help restore airflow and vapour consistency if residue or clogged screens are affecting performance.

What strength of isopropyl alcohol should I use?

For the Mighty+ Medic cooling unit, STORZ & BICKEL recommends 70% isopropyl alcohol for a maximum of 30 minutes. Always rinse and dry parts thoroughly before reassembly.

Are dosing capsules worth using?

Many users find dosing capsules helpful because they reduce loose material inside the filling chamber and can make cleaning easier.

How long should parts dry after cleaning?

Allow all parts to dry completely before reassembly. Drying time can vary depending on conditions, but no moisture or cleaning smell should remain before use.

Is it safe to clean the filling chamber with alcohol?

Yes, but only with a lightly dampened cotton bud. Hold the device upside down, avoid excess liquid and never pour alcohol directly into the chamber.

Can regular cleaning extend the life of my Mighty+ Medic?

Routine cleaning can help reduce residue build-up, protect small parts and maintain airflow and performance over time.

Conclusion

Keeping your Mighty+ Medic clean does not need to be complicated. Brush the filling chamber after each use, deep clean the removable cooling unit parts when residue builds up, keep liquid away from the device body and replace screens or seals when they no longer clean properly.

For easier maintenance, browse CannaDash’s range of Mighty+ Medic accessories, including replacement screens, O-rings, cooling units and dosing capsules.

For more vaporiser product guides and educational articles, visit the CannaDash Knowledge Hub.

CannaDash does not promote the use of natural medicines. Content on this website is for informational purposes only. For medical advice, please consult with your doctor. All medicines in Australia are regulated by the Therapeutic Goods Administration (TGA).
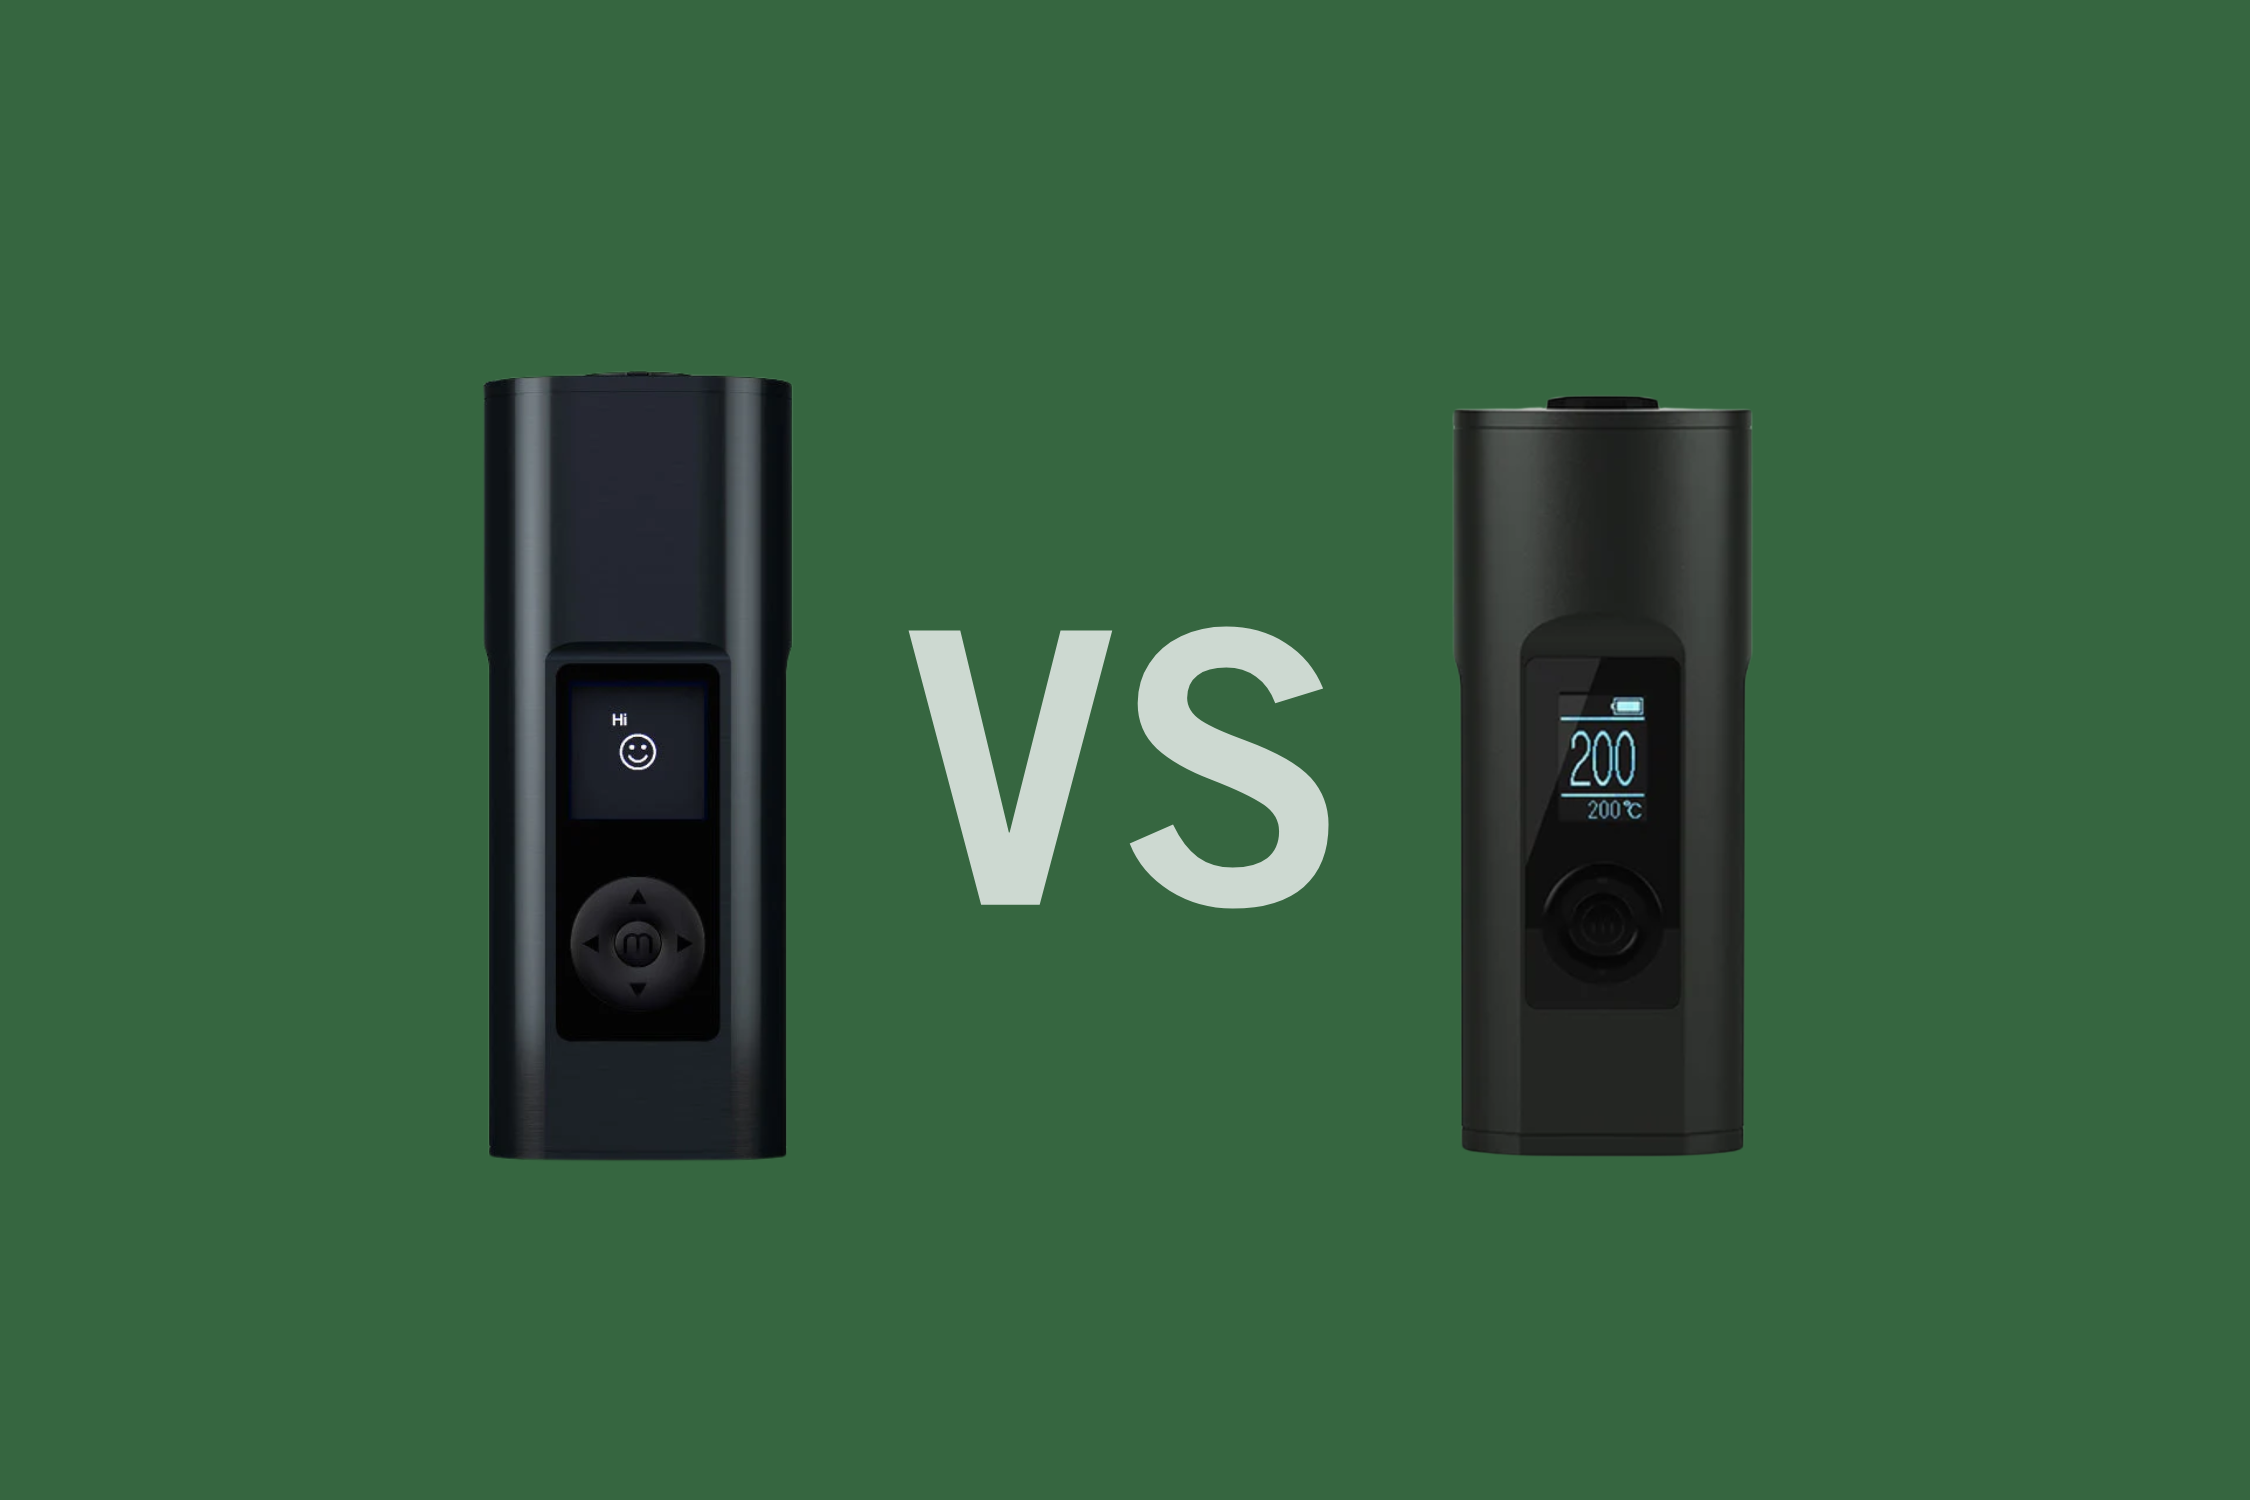
Arizer Solo 3 vs Arizer Solo 2 Max

The Arizer Solo 3 and Arizer Solo 2 Max are both premium portable dry herb vaporisers, but they suit slightly different users. The Solo 3 offers faster heat-up times, stronger vapour production, improved airflow and on-demand mode, while the Solo 2 Max remains a strong value choice for users who prefer simple, flavour-focused sessions.

For most buyers, the decision comes down to one question: are the Solo 3’s performance upgrades worth the higher price, or does the Solo 2 Max already give you everything you need?

At CannaDash, we stock both the Arizer Solo 3 and Arizer Solo 2 Max and regularly help customers compare the two before making a purchase. This guide compares both devices across the factors that matter most, including heat-up time, vapour quality, airflow, bowl capacity, battery life, cleaning, portability and value for money.

Quick Answer: Arizer Solo 3 vs Arizer Solo 2 Max – Which is Better?

The Arizer Solo 3 is better for users who want faster heat-up, stronger vapour production, improved airflow, larger stem options and the flexibility of both session and on-demand modes.

The Arizer Solo 2 Max is better for users who want reliable Arizer flavour, long battery life, simple controls and strong value at a lower price.

In simple terms, choose the Solo 3 if you want Arizer’s most advanced portable vaporiser. Choose the Solo 2 Max if you want a dependable, flavour-focused device without paying extra for newer performance features.

Arizer Solo 3 vs Arizer Solo 2 Max: Feature Comparison Table

Feature Arizer Solo 3 Arizer Solo 2 Max
Price $450 $330
Heating System Hybrid (80% convection / 20% conduction) Hybrid (80% convection / 20% conduction)
Vapour Production Stronger and denser Smooth
Heat-Up Time 5–15 seconds 30 seconds
Vaping Modes Session mode and on-demand mode Session mode only
Design 2.5cm taller, slightly wider Sleek and pocketable
Airflow Upgraded, more open draw Classic, slightly restricted
Battery Life Up to 3 hours Up to 3 hours
Charging USB-C PD USB-C
Cooling System Glass aroma tubes Glass aroma tubes
Ease of Cleaning Easy Easy
Build Quality Premium Premium
Warranty 2 years (excluding glass components) 2 years (excluding glass components)
Best Suited For Users who want faster, stronger and more flexible performance Users who want reliable Arizer flavour and value

How We Compared Them

This comparison is based on combining manufacturer product information, customer feedback received by the CannaDash team and our experience over the past 5 years helping Australian customers choose between Arizer vaporisers.

Rather than focusing only on specifications, we assessed the factors that matter most to customers comparing dry herb vaporisers, including vapour quality, heat-up speed, airflow, battery performance, ease of use, cleaning requirements and overall value for money.

Individual experiences can vary depending on temperature settings, grind consistency and personal preferences. This comparison focuses on the differences most consistently reported by customers and reviewers.

Heating Technology

One of the most important differences in the Arizer Solo 3 vs Arizer Solo 2 Max comparison is the heating system.

The Solo 2 Max uses Arizer’s proven convection-dominant heating approach. This style of heating is renowned for flavour preservation and efficient extraction.

The Solo 3 features a redesigned ceramic heating element that wraps around the stainless steel bowl without touching it. This delivers a large increase in raw power, which allows it to support the new XL Glass Pod stems.

The result is:

  • Faster heat-up times
  • Stronger vapour production
  • Improved extraction efficiency
  • Better performance during on-demand sessions

After comparing both devices side-by-side, the difference becomes particularly noticeable at higher temperatures, where the Solo 3 extracts material more quickly and produces denser vapour.

Winner: Arizer Solo 3 for heating power and flexibility

Heat-Up Time Comparison

Heat-up time is one of the most noticeable upgrades in the Solo 3.

The Solo 2 Max is already quick, reaching vaping temperature in under 30 seconds. For many users, that is more than fast enough.

The Solo 3 is faster again, reaching temperature in roughly 5–15 seconds depending on the selected mode and temperature. This makes a real difference if you prefer quick sessions or want to take a few draws without committing to a full session.

Winner: Arizer Solo 3 for faster heat-up

Bowl Capacity and Stem Options

The Solo 3 introduces new XL Glass stems that hold approximately 0.4g of dry herb, which is around double the capacity of the standard Solo 2 Max stems.

This can be helpful for users who prefer longer sessions, larger loads or fewer reloads. It also gives the Solo 3 more flexibility, as users can choose between standard stems and XL stems depending on how they want to use the device.

The Solo 2 Max uses standard glass aroma tubes, which may suit users who prefer smaller sessions, more controlled amounts and a simpler setup.

Winner: Arizer Solo 3 for larger capacity and flexibility

Airflow and Draw Resistance

Airflow is another area where the Solo 3 feels noticeably different.

The XL stems include an additional airflow hole, which gives the Solo 3 a more open draw. This means you do not need to inhale as firmly to get strong vapour, which can make the device feel easier and more comfortable to use during longer draws or higher-temperature sessions.

The Solo 2 Max still offers good airflow, but it has a more classic Arizer feel. Some users may find this slightly more restricted, while others may prefer the slower, more controlled draw.

For users who want a lighter and more effortless inhale, the Solo 3 will likely feel more comfortable.

Winner: Arizer Solo 3 for easier airflow

Vapour Quality Comparison

Both the Arizer Solo 3 and Solo 2 Max deliver strong flavour thanks to their glass vapour path. This is one of the main reasons Arizer vaporisers are popular with users who value clean, flavour-focused vapour.

The main difference is how the vapour is produced during a session.

When used side by side, the Solo 3 feels more powerful. It produces thicker vapour sooner in the session and has a more open draw, which makes each inhale feel less restricted. It also extracts material faster, so it suits users who want stronger output in a shorter session.

The Solo 2 Max still delivers excellent flavour, but the experience is generally smoother, lighter and more gradual. This may suit users who prefer slower sessions and flavour preservation over dense vapour production.

Winner: Arizer Solo 3 for vapour density, Solo 2 Max for slower flavour-focused sessions

Vaping Modes

The Solo 3 introduces both Session Mode and On-Demand Mode.

Session Mode provides the traditional Arizer experience, keeping the chamber warm over a set period. This is ideal for users who like to sit down for a full session and take several draws over 5–10 minutes.

On-Demand Mode heats when activated, allowing users to take shorter, more controlled draws without committing to a full session. This can be useful if you prefer quick use, want more flexibility or do not always want to finish a full session in one sitting.

The Solo 2 Max only offers Session Mode. This is not necessarily a drawback for users who prefer a simple and predictable session-style experience. If you do not need on-demand use, the Solo 2 Max still performs well.

Winner: Arizer Solo 3 for mode flexibility

Battery Life and Charging

Both the Arizer Solo 3 and Solo 2 Max offer up to 3 hours of battery life, making them strong options for users who want longer runtime between charges.

The main difference is charging performance. The Solo 3 supports USB-C PD charging, which can provide faster and more efficient charging when used with a compatible charger. The Solo 2 Max also uses USB-C, which is convenient and easy to manage.

For everyday use, both devices offer strong battery life. If battery performance is your main concern, either model is a solid choice.

Winner: Draw for battery life, Solo 3 for charging speed

Cleaning and Maintenance

Both models are easy to clean compared to many other dry herb vaporisers.

Arizer’s glass aroma tube system keeps most residue contained in the removable glass stem, rather than deep inside the device. This makes regular maintenance more straightforward and helps preserve flavour over time.

For most users, cleaning usually involves removing the glass stem, brushing out loose material and cleaning the glass as needed. The Solo 3 and Solo 2 Max are both strong choices if you want a vaporiser that is simple to maintain.

Winner: Draw

Portability and Everyday Use

Both devices are portable, but they are not ultra-compact pocket vaporisers.

The Solo 2 Max is slightly more compact and lightweight, which may make it easier to carry or store. It is a good option for users who want a portable Arizer vaporiser without needing the larger size and added performance features of the Solo 3.

The Solo 3 is taller and slightly wider, mainly due to its larger heater system and improved performance design. It is still portable, but it is better suited to users who prioritise power and flexibility over having the smallest possible device.

Winner: Solo 2 Max for compactness, Solo 3 for performance

Is the Arizer Solo 3 Worth the Extra Cost?

The Arizer Solo 3 is worth the extra cost if you want a device that feels faster, easier to draw from and more flexible during use.

The biggest difference is how quickly and comfortably the Solo 3 performs. It heats up in seconds, so you do not need to wait long before starting a session. It also has a more open draw, which means you can inhale more comfortably without needing to pull as firmly.

The Solo 3 also gives you more control over how you use it. Session Mode is ideal when you want to sit down for a longer session, while On-Demand Mode lets you take shorter draws without keeping the device heated the whole time. This can be useful if you prefer quick, controlled use rather than committing to a full session every time.

The XL stems are another important difference. They can hold more dry herb than the standard stems, which may suit users who prefer longer sessions or do not want to reload as often.

The Arizer Solo 2 Max is still a strong choice if you mainly want a simple, reliable vaporiser for full sessions. It still offers excellent flavour, strong battery life and easy cleaning at a lower price. If you do not need faster heat-up, larger stems or on-demand use, the Solo 2 Max may be the better value option.

To learn more, visit our Knowledge Hub or browse our full range of dry herb vaporisers.

CannaDash does not promote the use of natural medicines. Content on this website is for informational purposes only. For medical advice, please consult with your doctor. All medicines in Australia are regulated by the Therapeutic Goods Administration (TGA).
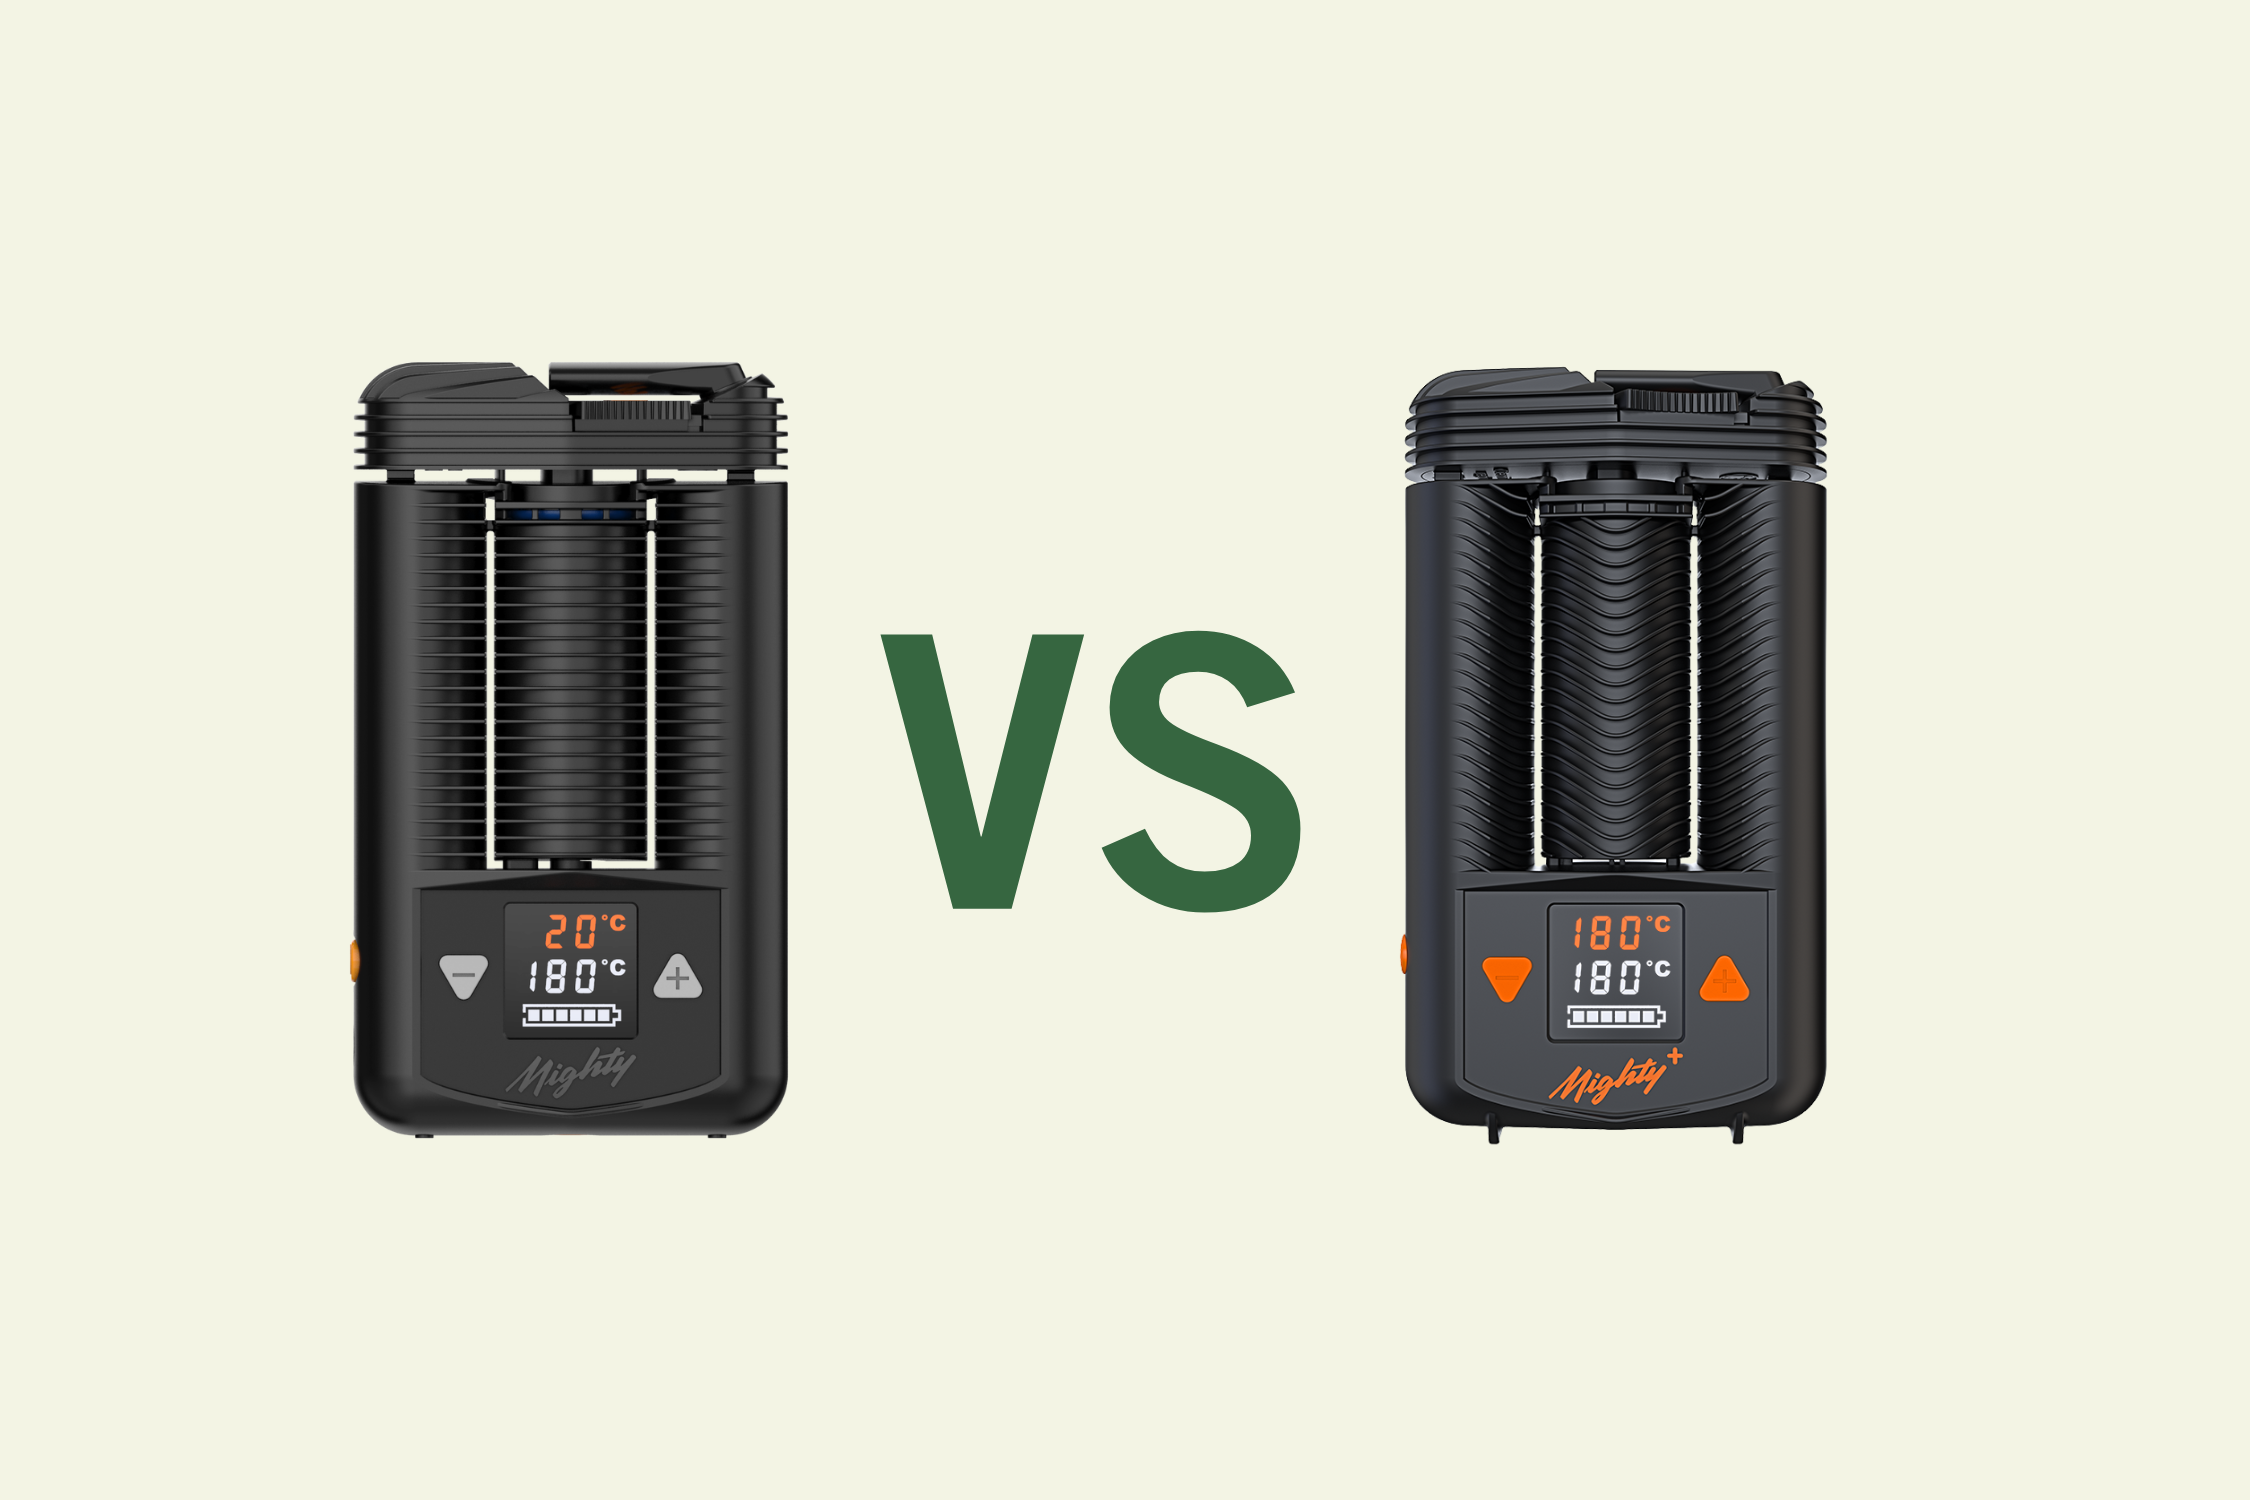
Storz & Bickel Mighty+ Medic vs Mighty Medic

With the release of the Storz & Bickel Mighty+ Medic, many enthusiasts are asking the same question: Is it worth upgrading from the Mighty Medic to the Mighty+ Medic?

If you’ve been researching premium portable vaporisers, chances are you’ve come across the legendary Storz & Bickel Mighty.

For years, it’s been regarded as one of the best portable dry herb vaporisers on the market thanks to its exceptional vapour quality, reliable battery life and medical-grade engineering.

In this guide, we compare the original Mighty Medic and the Mighty+ Medic side by side to help you decide which device best suits your needs and, most importantly, whether it’s worth upgrading if you’re already using the Mighty Medic.

For new buyers, the original Mighty Medic has now been discontinued in Australia, leaving the Mighty+ Medic as the only option.

What Is the Difference Between the Mighty and Mighty+ Medic?

At first glance, the two devices look very similar.

Both feature the same iconic design, hybrid convection/conduction heating system and cooling unit that made the original so popular.

However, the Mighty+ Medic introduces several hardware and usability upgrades designed to modernise the experience.

The biggest improvements include:

  • USB-C charging
  • Faster heat-up times
  • Ceramic-coated filling chamber
  • Improved charging capabilities
  • Slightly smaller in design

While the core vaping experience remains similar, these enhancements make the Mighty+ Medic more convenient for modern users.

Mighty vs Mighty+ Medic: Feature Comparison Table

Feature Mighty Medic Mighty+ Medic
Charging Port Proprietary charger USB-C
Fast Charging No Yes
Heat-Up Time Around 90 seconds Around 60 seconds
Filling Chamber Aluminium Ceramic-coated
Pass-Through Charging Limited Supported with a compatible charger
Vapour Quality Excellent Excellent
Battery Life Excellent Excellent
Build Quality High Quality Premium

Design & Build Quality

The original Mighty Medic has long been known for its solid build and practical design. It is not the smallest portable vaporiser, but it feels sturdy, dependable and simple to use.

The Mighty+ Medic keeps the familiar Storz & Bickel design but makes a few useful refinements.

The most noticeable changes include:

  • Redesigned cooling fins for a more comfortable grip
  • Improved housing
  • Better upright stability
  • Ceramic-coated filling chamber
  • Modern USB-C charging port

The improved stability is a small but useful change. It makes loading and packing easier because the device can sit upright more securely during use.

The Mighty+ Medic also uses carefully selected materials, including a ceramic-coated filling chamber and a cooling unit made from PEEK, a high-quality plastic used in medical technology.

Overall, the two devices feel premium, but the Mighty+ Medic offers a slightly more polished and modern finish.

Heating Performance

Both vaporisers use convection and conduction heating together, delivering dense vapour and excellent flavour.

Our patients report noticeably faster heat-up times with the Mighty+ Medic, particularly when using higher temperatures, with improvements of around 20-50%.

In real-world use, the vapour quality between the two devices is very similar. Both deliver smooth, cool vapour with impressive extraction efficiency.

If you already own a Mighty, don’t expect dramatically different vapour production.

The improvements are subtle and more about efficiency rather than a complete performance overhaul.

Charging & Battery Life

This is where the Mighty+ Medic really separates itself.

The original Mighty Plus uses a barrel-style charger, while the Mighty+ Medic upgrades to modern USB-C charging.

The Mighty+ Medic also supports USB-C Power Delivery fast charging, allowing the device to charge to approximately 80% in around 40 minutes when using a compatible charger.

For many users upgrading, this is one of the most valuable features. USB-C compatibility means:


  • Easier charging while travelling
  • Compatibility with modern chargers and power banks
  • Faster recharge times
  • Reduced need for proprietary cables

Battery life itself remains excellent on both models, with multiple sessions possible on a single charge.

Ceramic Coated Chamber: Does It Matter?

One of the headline features of the Mighty+ Medic is its ceramic-coated filling chamber.

The ceramic coating improves scratch resistance and overall durability.

Most of our patients feel that the ceramic chamber does not dramatically alter vapour flavour, but it may help with long-term maintenance and cleaning of the device.

If you prioritise durability and easier upkeep, this is a welcome improvement.

Performance & Vapour Quality

Both vaporisers produce smooth, cool and flavourful vapour with impressive extraction efficiency.

If you already own the original Mighty Medic, don’t expect dramatically different vapour production.

The improvements are more about usability and speed rather than a complete performance overhaul.

The Mighty+ Medic does heat up faster, typically in around 60 seconds, compared to roughly 90 seconds on the original Mighty Medic.

Is the Mighty+ Medic worth the upgrade?

The answer largely comes down to how you use your device and which features matter most to you.

The Mighty+ Medic builds on the strong reputation of the original Mighty Medic, introducing a range of practical improvements focused on convenience, charging and everyday usability.

The Mighty+ Medic is worth upgrading to if:

  • You want the convenience of USB-C charging
  • Faster heat-up times are important to you
  • You use your device frequently
  • You travel regularly with your device
  • Your current battery performance has started to decline
  • Your existing device is showing signs of wear or becoming harder to maintain
  • You prefer having the latest medical model and updated hardware

For many existing Mighty owners, the upgrade feels more like a refined evolution than a complete redesign, particularly as the vapour quality remains consistently excellent across both devices.

The most noticeable improvements are the faster charging, improved heat-up speed, updated chamber design and overall ease of use.

For new buyers, the Mighty+ Medic is the logical choice, especially in Australia, where the older model is no longer available.

With USB-C charging, improved durability and several thoughtful refinements, it offers a more modern user experience while maintaining the vapour performance the Mighty range is known for.

Final Thoughts

Both the Mighty and Mighty+ Medic continue to represent the gold standard for portable dry herb vaporisers.

The Mighty remains an outstanding device, and if yours still works well, there’s really no need to upgrade.

But if your Mighty is older and showing signs of wear, you’ll love the convenience and modern features of the Mighty+ Medic.

If you’re a frequent user, don’t forget the supercharger- it’s a game-changer for keeping your device powered up and ready to go when you need it most.

If you’re thinking of upgrading or buying a new dry herb vaporiser, check out the Mighty+ Medic today!

If you’d like to learn more, visit our knowledge hub.

CannaDash does not promote the use of natural medicines. Content on this website is for informational purposes only. For medical advice, please consult with your doctor. All medicines in Australia are regulated by the Therapeutic Goods Administration (TGA).
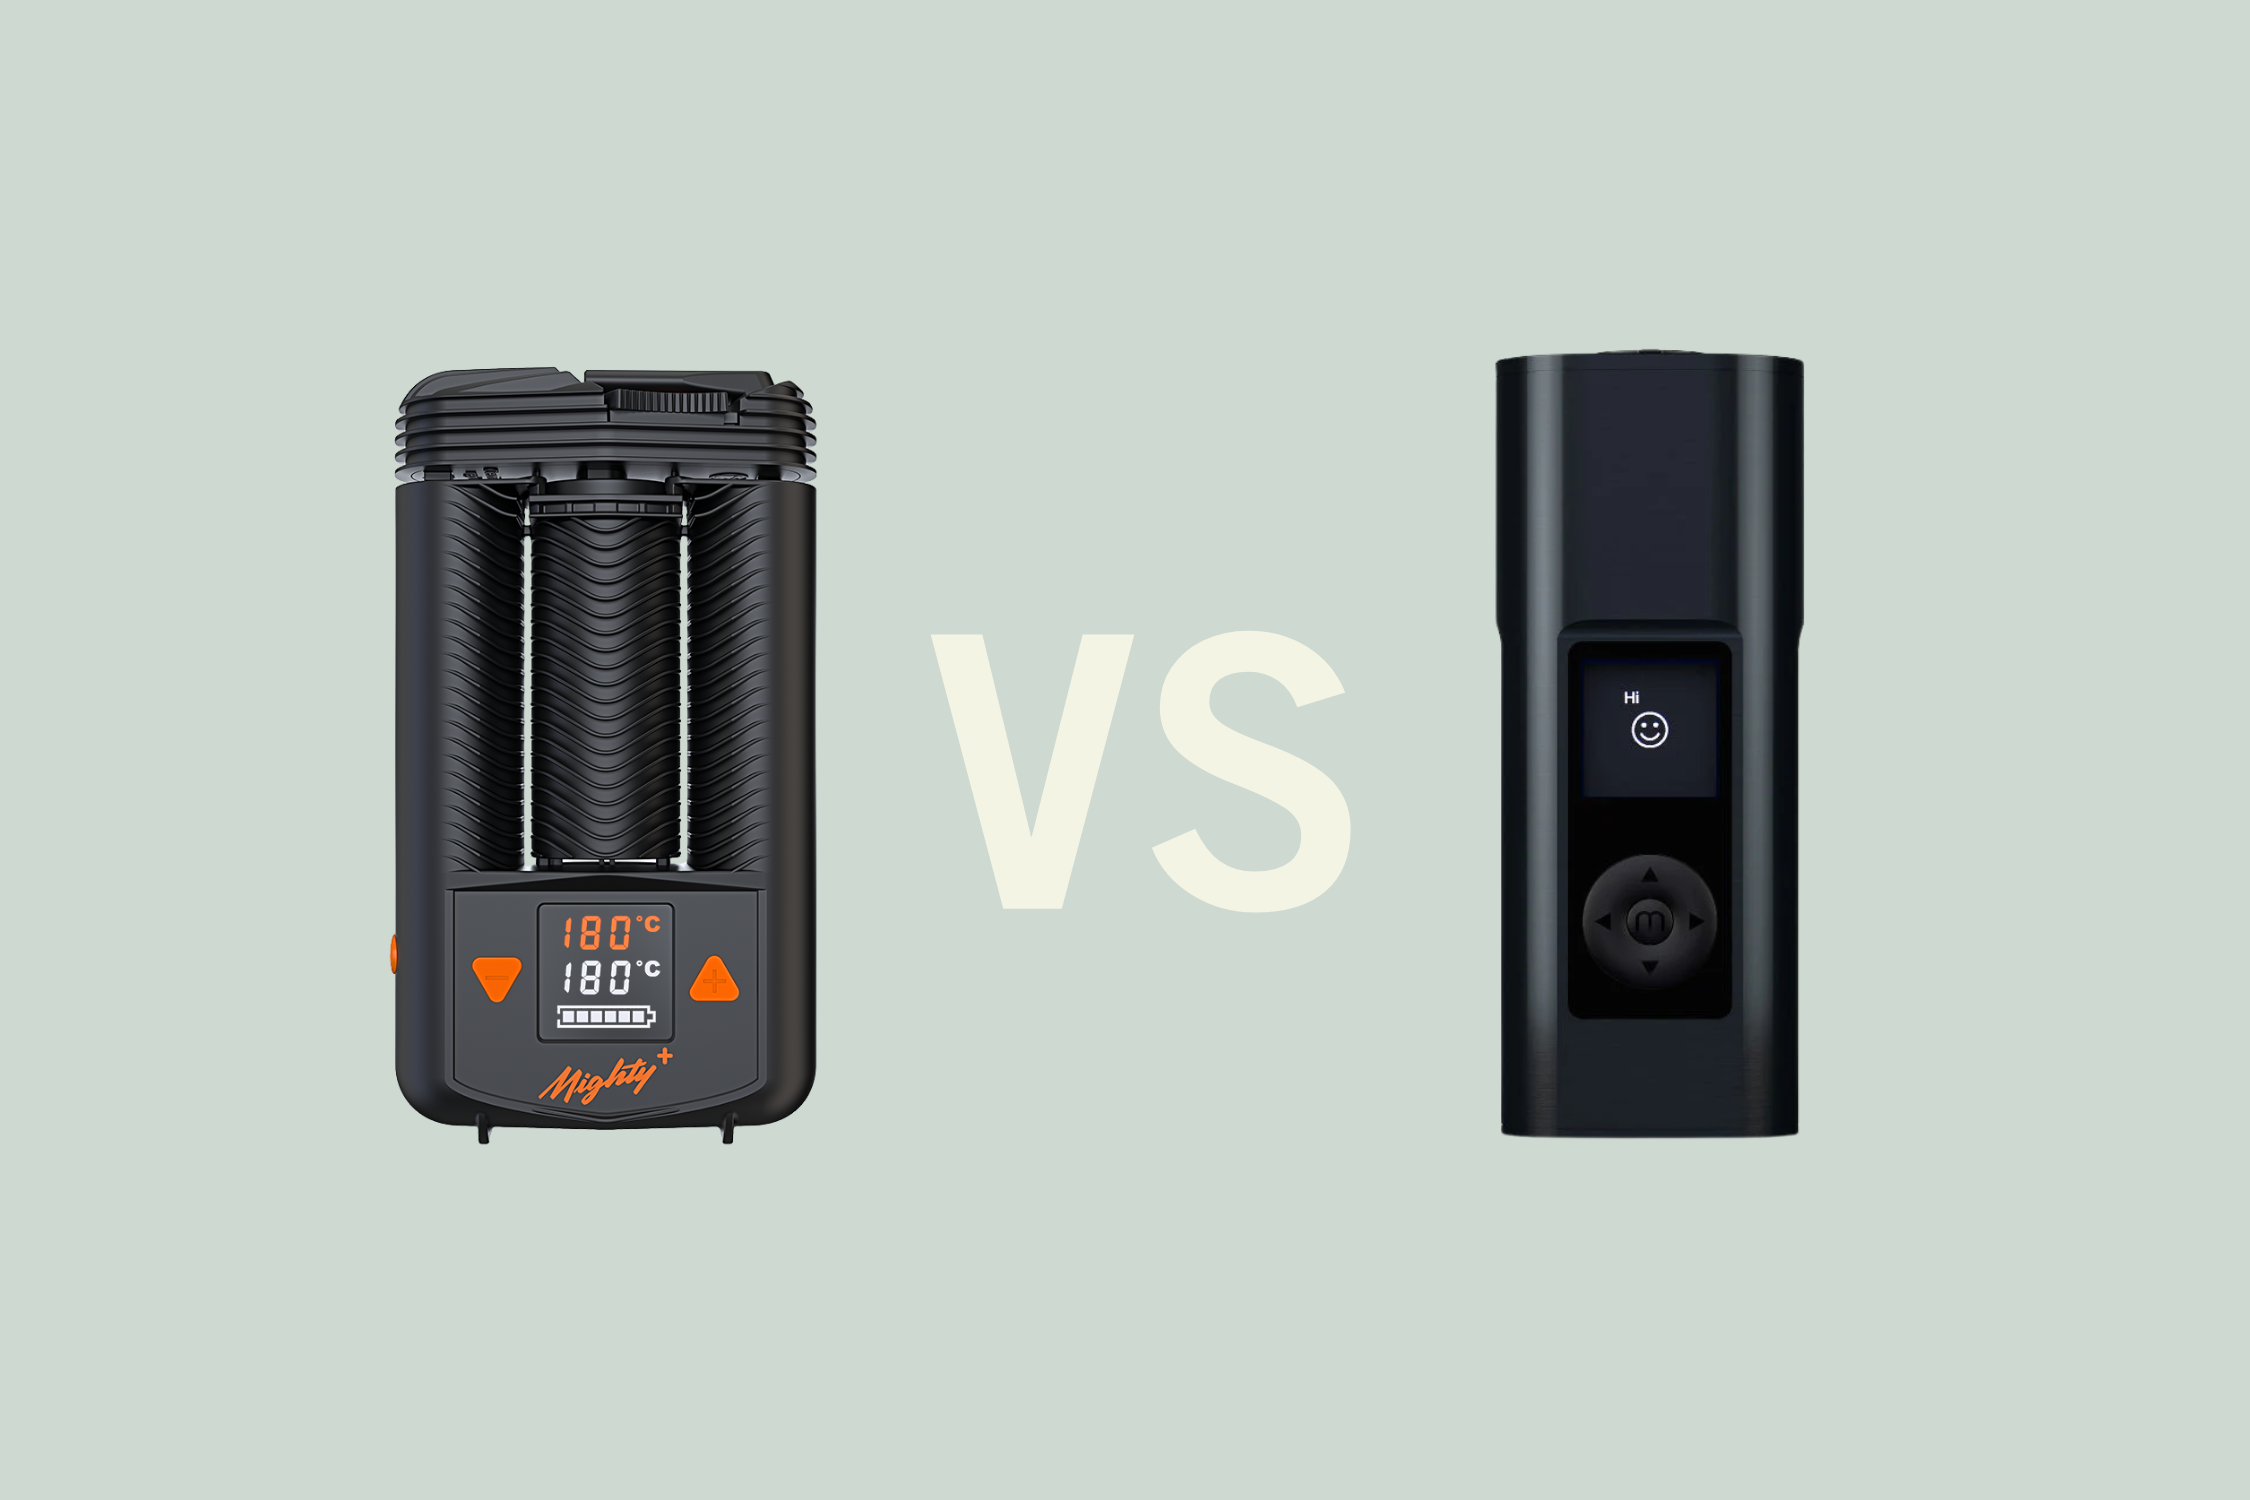
Mighty+ Medic vs Arizer Solo 3 – Best Portable Vaporiser in Australia?

If you’re shopping for a premium portable dry herb vaporiser in Australia, two devices consistently dominate the conversation: the Mighty+ Medic and the Arizer Solo 3.

Both offer outstanding vapour quality, hybrid heating technology and medical-grade performance, but they cater to slightly different users.

At CannaDash, we stock both devices and after comparing their features, performance and overall usability, here’s our take on which one might suit you best.

Arizer Solo 3 vs Mighty+ Medic: Feature Comparison Table

Feature Mighty+ Medic Arizer Solo 3
Heating System Hybrid Hybrid
Vapour Quality Dense, smooth and consistent Extremely clean and flavour-rich
Cooling System Integrated cooling unit for smoother inhalation All glass vapour path for pure flavour
Heat-Up Time Around 60 seconds 5-15 seconds
Battery Life Strong battery life for daily use Up to 3 hours of use
Charging USB-C fast charging USB-C charging with passthrough support
Session Modes Session mode On-demand and session modes
Durability Sturdy design with no exposed glass Glass stems are more fragile
Cleaning Cooling unit requires regular cleaning Simple, removable glass stems

Mighty+ Medic Review & Features

The Mighty+ Medic vaporiser has built a reputation as one of the most reliable portable vaporisers available.

Manufactured by Storz & Bickel, it is listed on the Australian Register of Therapeutic Goods under ARTG 525733, which is one of the biggest differences between the Mighty+ Medic and most other portable vaporisers in Australia.

That does not automatically make it the right choice for everyone, but it does matter for patients who want a device that has been formally assessed in a medical context.

It may also be relevant if your prescriber, pharmacist or reimbursement pathway requires a registered device.

Its standout feature is the integrated cooling unit, which helps cool the vapour before it reaches the mouthpiece.

In practical terms, this makes the Mighty+ Medic feel smoother and more comfortable to use, especially for people who use their device regularly as part of a prescribed treatment plan.

The hybrid convection/conduction heating system is another major strength. It delivers dense, consistent vapour across the full session without needing much effort or chamber stirring.

The Mighty+ Medic is also built for regular use. It is heavier and larger than some portable vaporisers, but that is part of what makes it feel so sturdy. There are no exposed glass stems to worry about, and the overall design feels made to handle daily use.

Other key benefits include:

  • USB-C fast charging
  • Precise temperature control
  • Excellent dosing capsule system
  • Integrated cooling unit
  • Hybrid convection/conduction heating
  • ARTG listing in Australia
  • Durable, travel-friendly build
  • Smooth and comfortable inhalation

The downside?

It is larger than many portable vaporisers and comes at a premium price point. Heat-up time is also slower than newer competitors, sitting at around 60 seconds.

Arizer Solo 3 Review & Features

The Arizer Solo 3 is one of the newest high-end portable vaporisers on the market and has quickly gained a strong following among flavour-focused users.

Arizer has improved almost every aspect of the previous Solo models, with incredibly fast heat-up times, huge battery life and upgraded airflow.

Compared to earlier generations, the Solo 3 delivers noticeably denser vapour production, stronger extraction and a much more open draw resistance, making it feel closer to a desktop-style experience in a portable device.

One of the biggest advantages is the all-glass vapour path, which delivers exceptionally clean and pure flavour.

Because the vapour only passes through glass and stainless steel components, users experience minimal flavour interference, making the Solo 3 especially popular among terpene enthusiasts and medical users who prioritise taste quality.

The Solo 3 also features:

  • Up to 3 hours of battery life
  • On-demand and session modes
  • USB-C charging with passthrough support
  • Fast 5-15 second heat-up times
  • Easy-to-clean glass stems
  • Improved airflow over previous Solo models
  • Large oven capacity for longer sessions
  • Customisable temperature controls
  • Bright colour display with intuitive controls
  • Dual-use functionality for both quick hits and extended sessions

The addition of on-demand mode is one of the biggest upgrades over previous Arizer devices.

Users can take quick single draws without running a full session, helping conserve herbs and improving efficiency for lighter users.

Battery performance is another standout feature.

The Solo 3 is capable of handling multiple sessions on a single charge, making it ideal for home use, travel or all-day reliability without constantly needing to recharge.

Despite its larger size compared to ultra-portable vaporisers, the Arizer Solo 3 vaporiser still feels comfortable to use and delivers one of the most impressive portable vaping experiences currently available.

The main consideration with the Solo 3 is portability and durability.

Because it uses removable glass stems, it requires a little more care when travelling compared to devices like the Mighty+ Medic.

However, many users are happy to make that trade-off for the exceptional flavour quality and easy cleaning that the glass system provides.

For users who value flavour, battery life and powerful performance, the Solo 3 is easily one of the best premium portable dry herb vaporisers on the market today.

It combines desktop-level vapour production with the convenience of a portable device, making it an excellent option for both experienced users and medical cannabis patients looking for a high-performance vaporiser.

If you’re chasing rich terpene flavour, fast heat-up times and long-lasting battery life, the Arizer Solo 3 is a device we highly recommend.

Mighty+ Medic vs Arizer Solo 3 – Which Option Should I Choose?

Both devices are excellent, but the best choice depends on your priorities.

If you want the most reliable all-round medical vaporiser with smooth vapour, portability and proven long-term performance, the Mighty+ Medic is still one of the best portable vaporisers available today.

If flavour quality, battery life and fast heat-up are more important to you, the Arizer Solo 3 offers incredible value and modern performance that rivals much more expensive devices.

For many users, the decision comes down to this:

  • Choose the Mighty+ Medic for portability, comfort and durability
  • Choose the Arizer Solo 3 for flavour, battery life and fast sessions

Whichever you choose, both are among the best premium dry herb vaporisers available in Australia right now.

If you’d like to learn more, visit our knowledge hub.

CannaDash does not promote the use of natural medicines. Content on this website is for informational purposes only. For medical advice, please consult with your doctor. All medicines in Australia are regulated by the Therapeutic Goods Administration (TGA).

Hey Vapers! Curious about the latest vaping regulations?

The new vaping Reforms Act that the government introduced on the 1st of July 2024 has changed the way vapes can be sold and advertised.

Here’s what you need to know:

  • Retailers like tobacconists, vape shops and convenience stores can no longer sell any type of vape
  • Vapes are now exclusively available at pharmacies
  • Currently you need a script to purchase a vape at a pharmacy but starting the 1st of October they’ll be available without one.

From the 1st of October, vapes with nicotine concentrations of 20mg/ml or less can be purchased without a prescription by people 18 years or older.  Pharmacies will only be able to provide a maximum of one month supply of vapes per visit, once a month. Pharmacists will also need to ensure that they’re suitable for you and meet several other conditions such as offering you advice on alternative smoking cessation therapies.

Vapes with a nicotine concentration greater than 20mg/ml or people under 18 years of age will require a prescription with a special approval to be able to access vapes.

Stay informed and make choices that suit you best!


For further info or advice for individuals wanting to quit vaping click here.

Smoking or Vaping – What’s better?

Smoking and vaping are both methods of inhaling natural medicines by heating herbs to create a vapour for inhalation. In its dried form, medicinal cannabis contains active compounds called cannabinoids. Heating the dried flower by smoking or vaping activates these compounds, converting them into their active forms such as tetrahydrocannabinoid (THC) and cannabidiol (CBD).

Smoking

Smoking results in a quick onset of action, higher blood levels of THC and CBD and a shorter duration of action compared with ingested cannabis. However, with 40% of the THC dose lost during smoking it does have significant individual variability. Smoking is not supported by current legislation mainly due to the cancer-causing substances which result and then are inhaled directly into the lungs.

Vaping

Vaping also provides rapid absorption and high blood concentrations like smoking but at lower temperatures. No combustion occurs, which results in fewer toxins being produced. The first effects occur within 90 seconds, reaching a maximum effect after 15-30 minutes and then reducing off after 2 to 4 hours. Vaporising releases cannabinoids and terpenes as vapour, avoiding the combustion process. Terpenes contribute to the aroma characteristics of cannabis. This method is suitable for conditions requiring rapid relief and the dosage depends on the volume placed in the vaporisier, temperature and duration. We recommend beginners or those transitioning from smoking start with a low dose to avoid the risk of adverse effects. Vaporisation is not recommended for individuals with known respiratory or lung conditions.

What factors influence vaporisation?

The quality and quantity of herb placed in the filling Chamber has the greatest effect on vaporisation. Other important factors include the surface area of the plant materials and the vaporisation temperature:
Surface area – The finer the plant material is ground, the greater the surface area from which the active ingredients can be released.
Temperature – The higher the temperature the more active ingredients are released at once.

Benefits of Vaping

The main benefit of vaporisation is the reduced exposure to toxins as a result of the combustion of cannabinoids but also there is far less wastage and odour than smoking. Vaporisers also allow temperature control which affects the therapeutic effects of cannabis. Starting at lower temperatures (we recommend 180 degrees Celsius) and increasing slowly helps find the optimal therapeutic effect. Ideal temperatures vary based on the flower variety.

In Summary

Both smoking and vaping involve heating herbs for inhalation. Smoking results in greater health risks and more variable THC concentrations making vaporising a safer option. Also vaping allows temperature control which is important in influencing therapeutic effect of cannabinoids.

View our range of Dry Herb Vaporsiers, Accessories & Parts.